How to create a visibility (information barrier) policy for instant messages
Last updated: October 17, 2026
Visibility policies (also called information barriers) control which groups or employees are allowed to see a given set of instant message communications. Use this workflow any time you need to restrict visibility of a team's or desk's chat activity to a specific group of reviewers, or exclude that team's communications from everyone outside it.
Where to start
Open the instant messages settings area and go to the Visibility policies tab. This list shows every barrier that has been created so far, along with its status and creation date. To start a new one, select New policy.
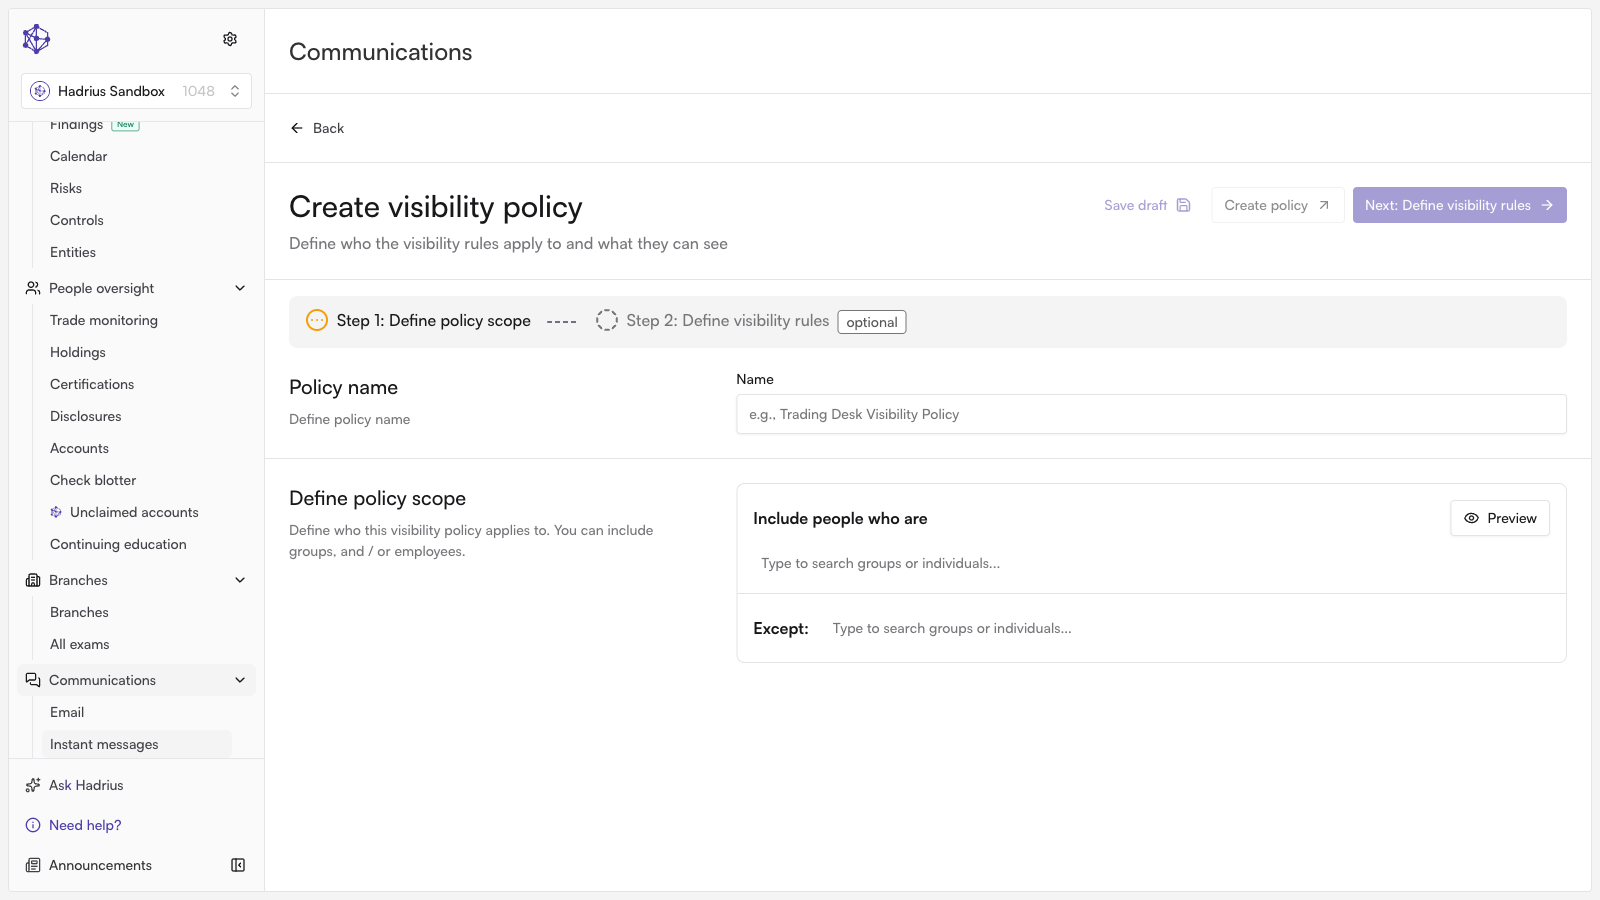
Step 1: Define the policy scope
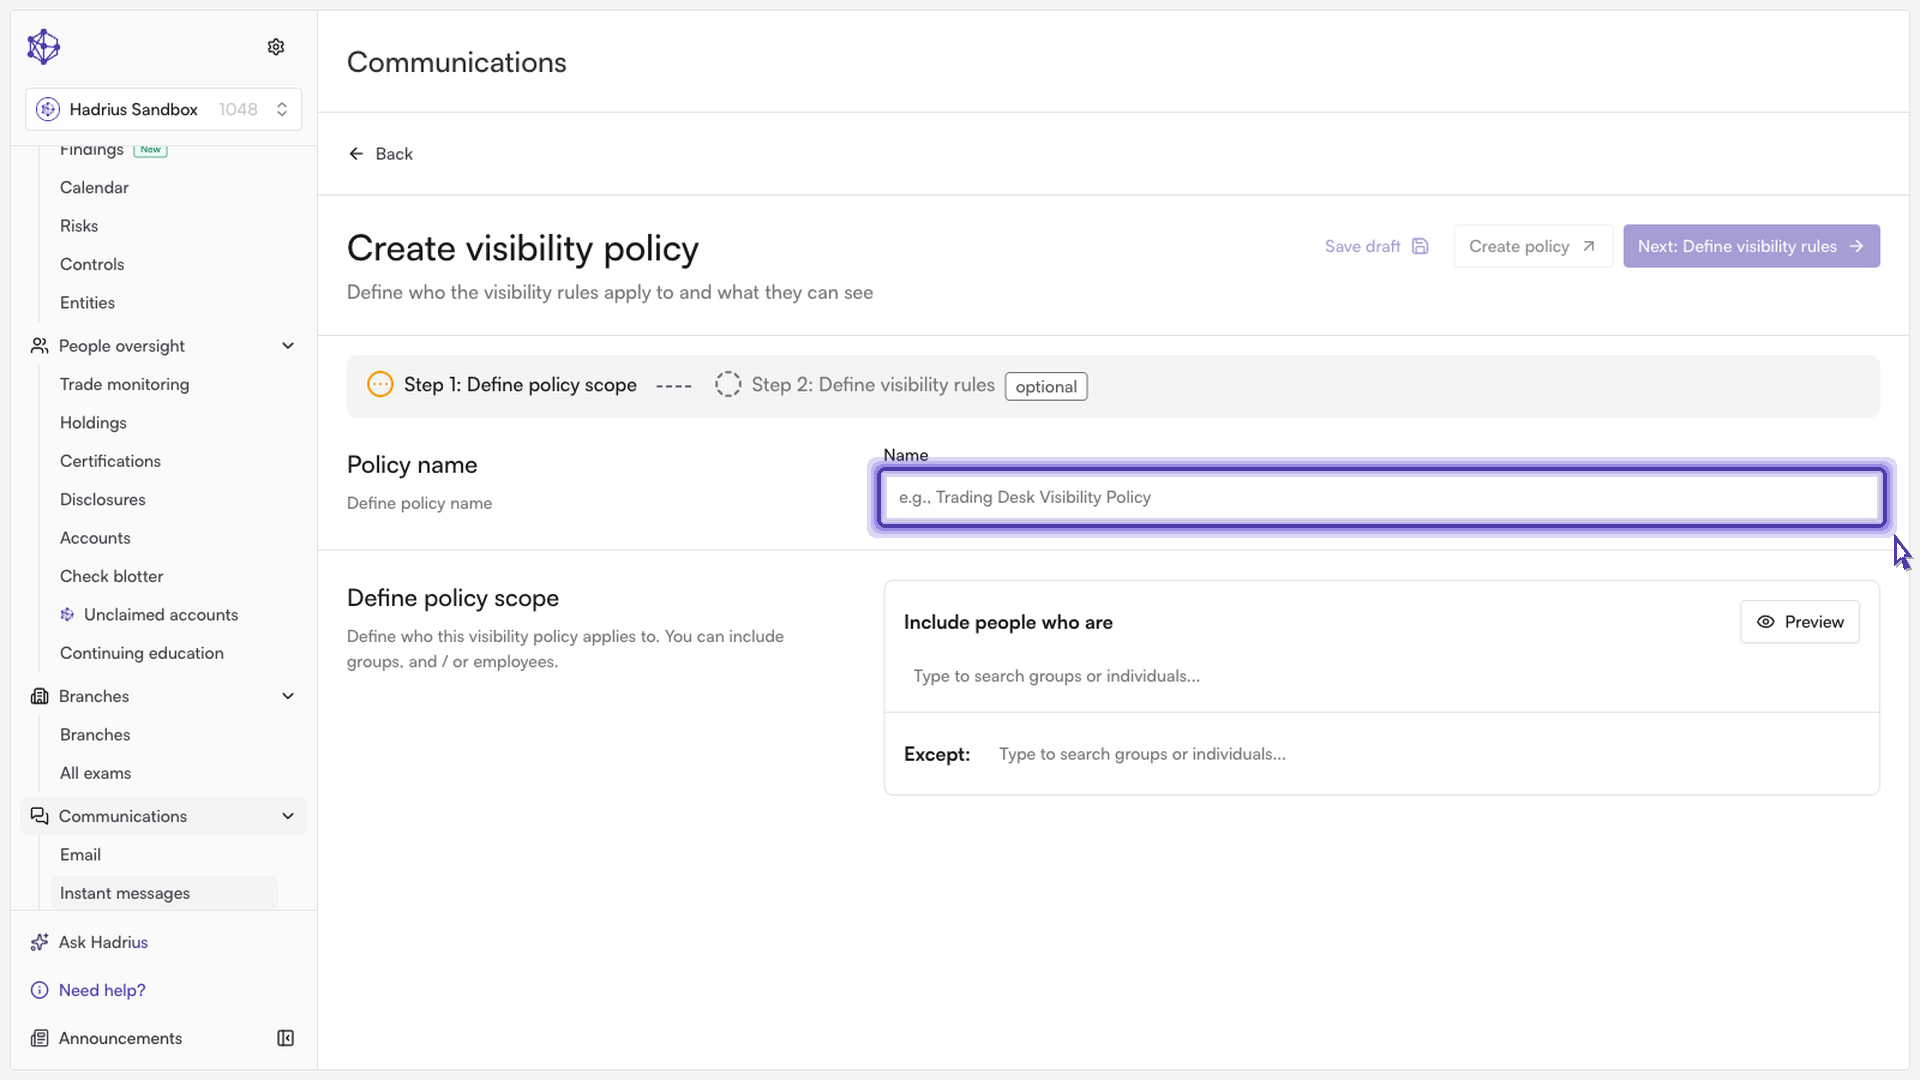
The wizard opens on Define policy scope. First, give the policy a clear name (for example, something that identifies the desk or team it governs) — this is what will show up in the policy list later, so it should be easy to recognize at a glance.
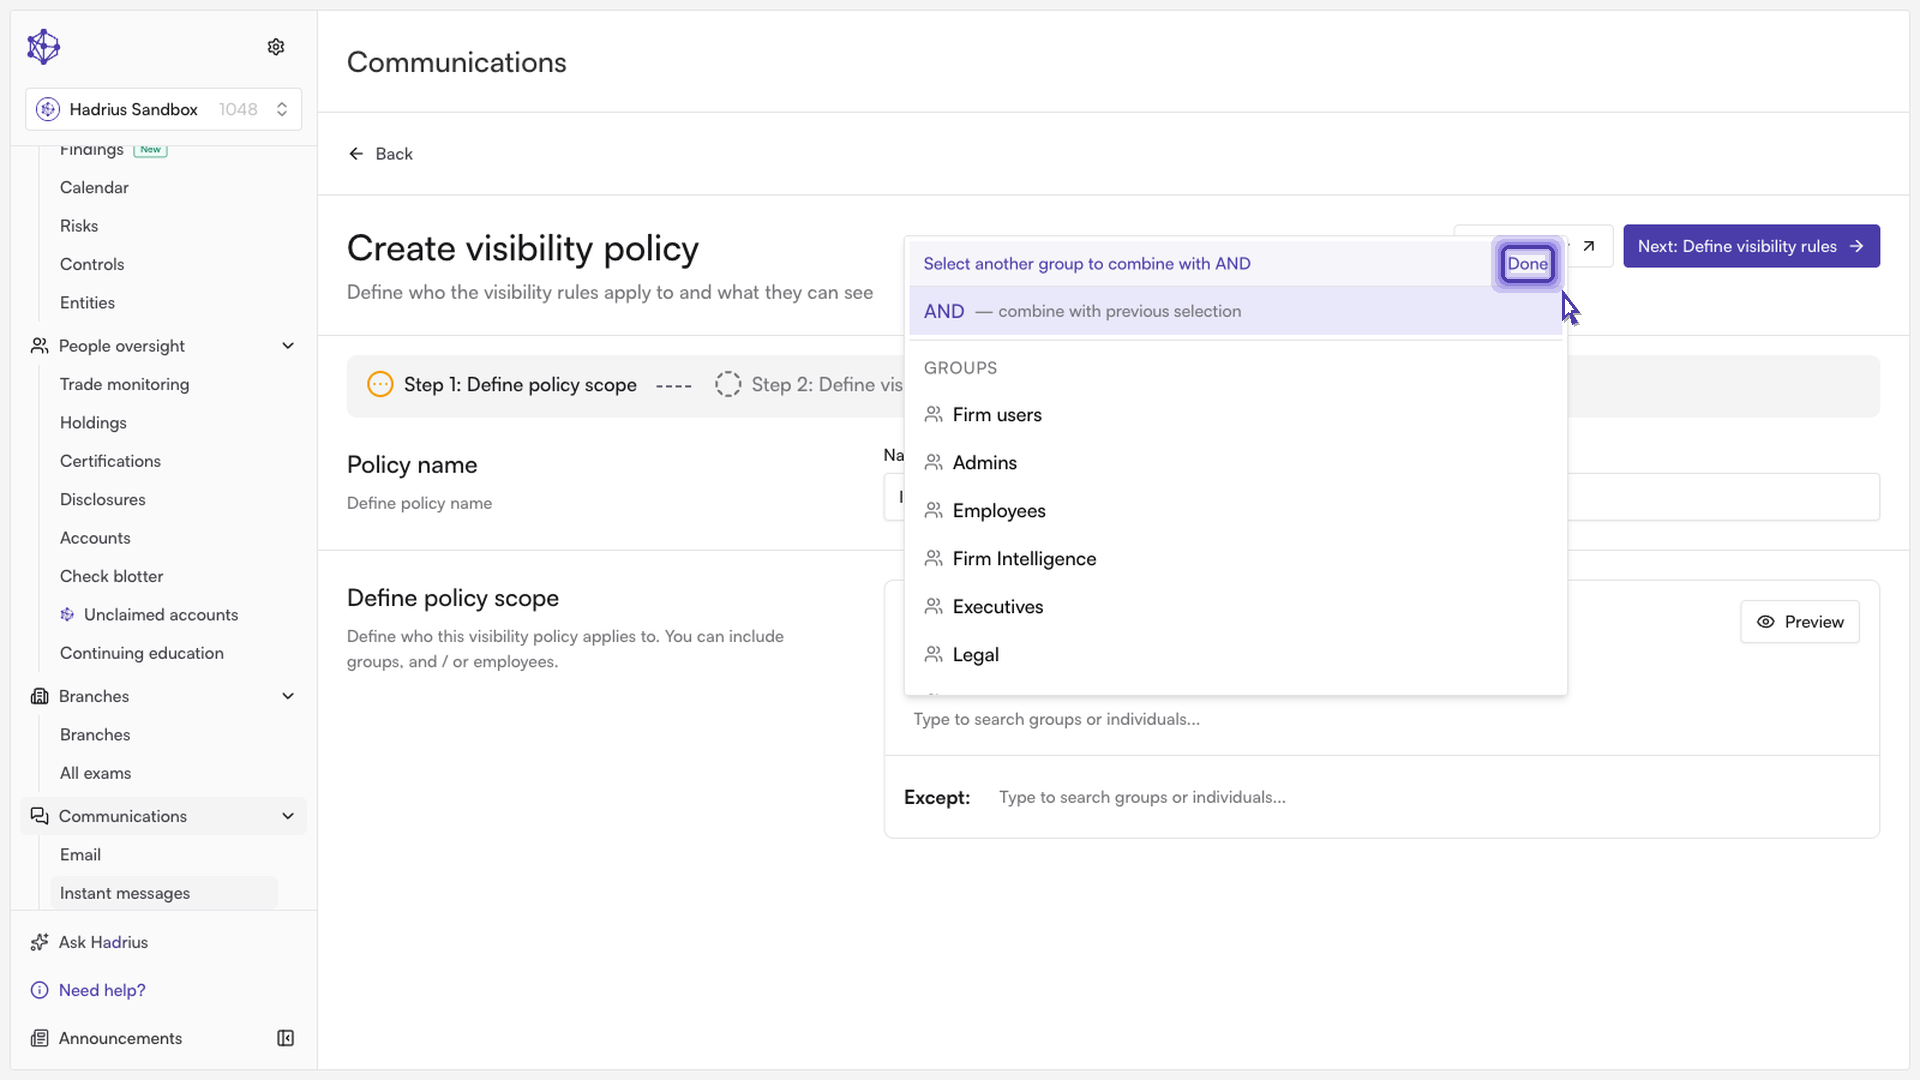
Next, define who the policy applies to. Search for and select the group (or individual employees) this barrier should cover. You can include multiple groups and employees in the same policy, and at least one must be selected before you can continue.
From this step you can also select Save draft to save your progress without activating anything, or Create policy to save the policy immediately with full visibility access and no restrictions yet. To define restrictions, select Next: Define visibility rules.
Step 2: Define visibility rules (optional)
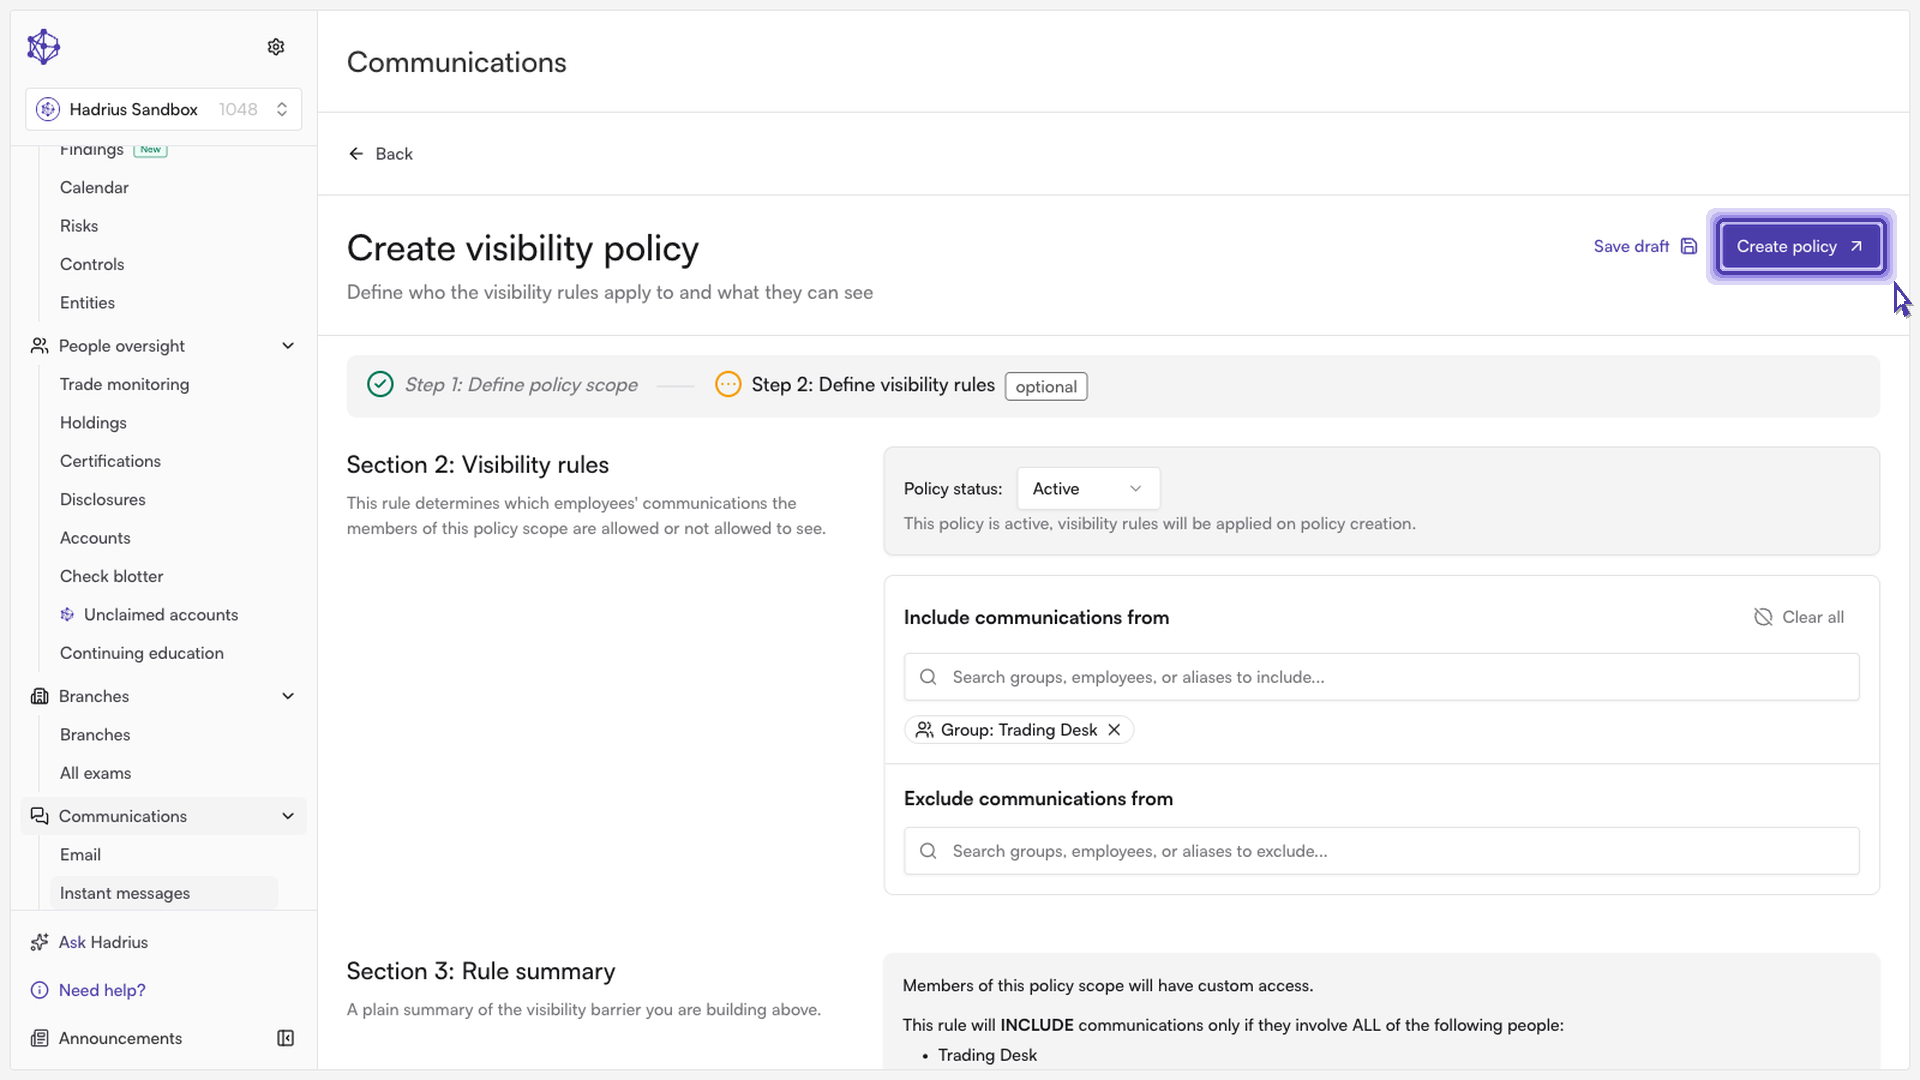
This step is marked optional — skipping it creates a policy where the selected scope has full visibility access. If you do want to restrict what this group can see, start by setting the Policy status:
Draft — the policy is saved but its visibility rules are not enforced.
Active — the visibility rules are enforced as soon as the policy is created.
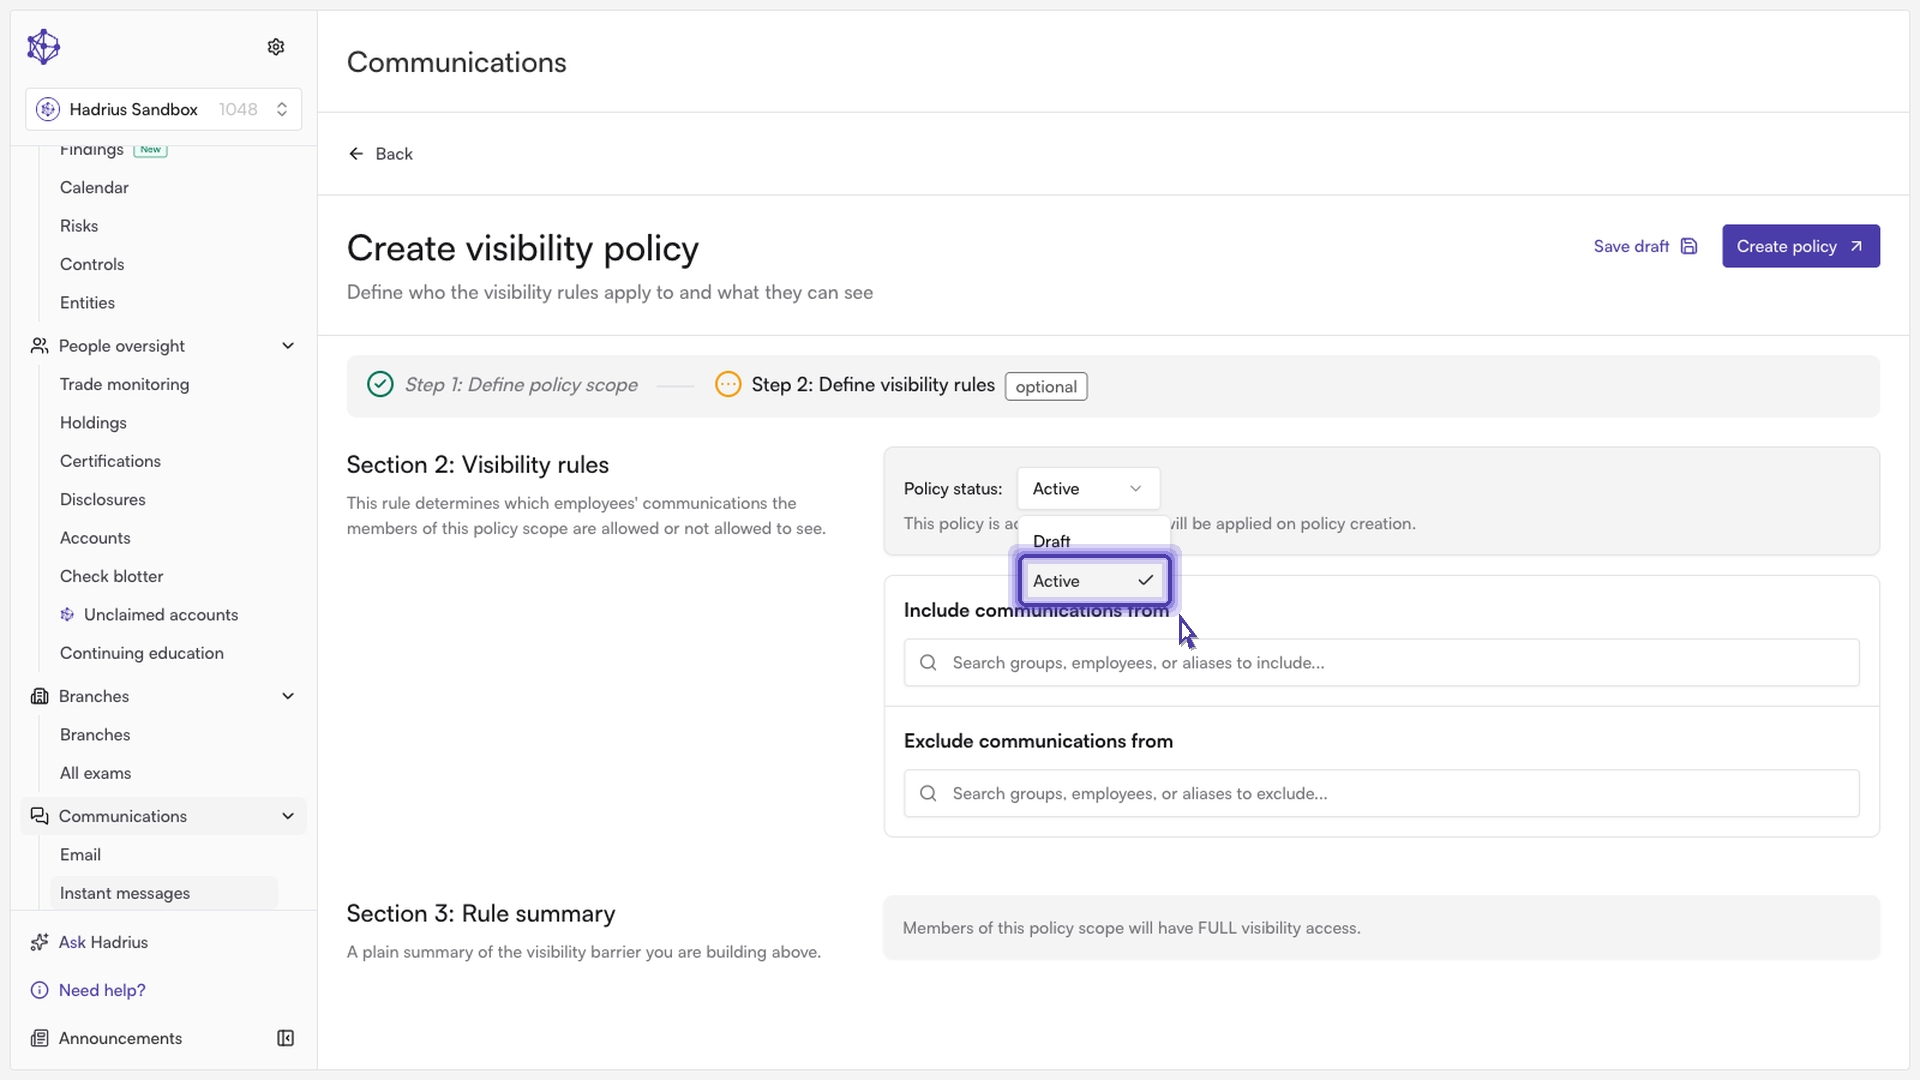
Then use the visibility builder to define what the scoped group can and cannot see. You can include or exclude specific employees, groups, or message aliases from what this policy's members are permitted to view — commonly, excluding a desk's own communications so only members of that desk (and anyone else you explicitly include) can see them. A plain-language rule summary updates below the builder as you make selections, so you can confirm the barrier behaves as intended before saving.
Saving the policy
When the scope and rules are set the way you want, select Create policy. If the status is set to Active, the barrier takes effect immediately; if it's Draft, it's saved but not yet enforced. You'll be returned to the policy list, where the new barrier now appears alongside the others.
Once created, a policy can be edited or deleted at any time from the policy list using the row actions menu, and its ID can be copied from the same menu if you need to reference it elsewhere.