Creating a Checklist and Assigning It to a Group
Last updated: September 30, 2026
Onboarding checklists connect an employee group to the tasks every member of that group needs to complete. Instead of assigning certifications and disclosures to people one at a time, you build the checklist once, attach it to a group, and let group membership drive the assignments. This article walks through creating a checklist from scratch, creating a group that uses it, adding members, and confirming what the employee sees.
Before you start
Only published certification and disclosure templates can be added to a checklist, so make sure the templates you plan to use are active before you begin. You will also need access to the employee settings area, which is reached from the people directory — the home base for managing employee records across the platform.
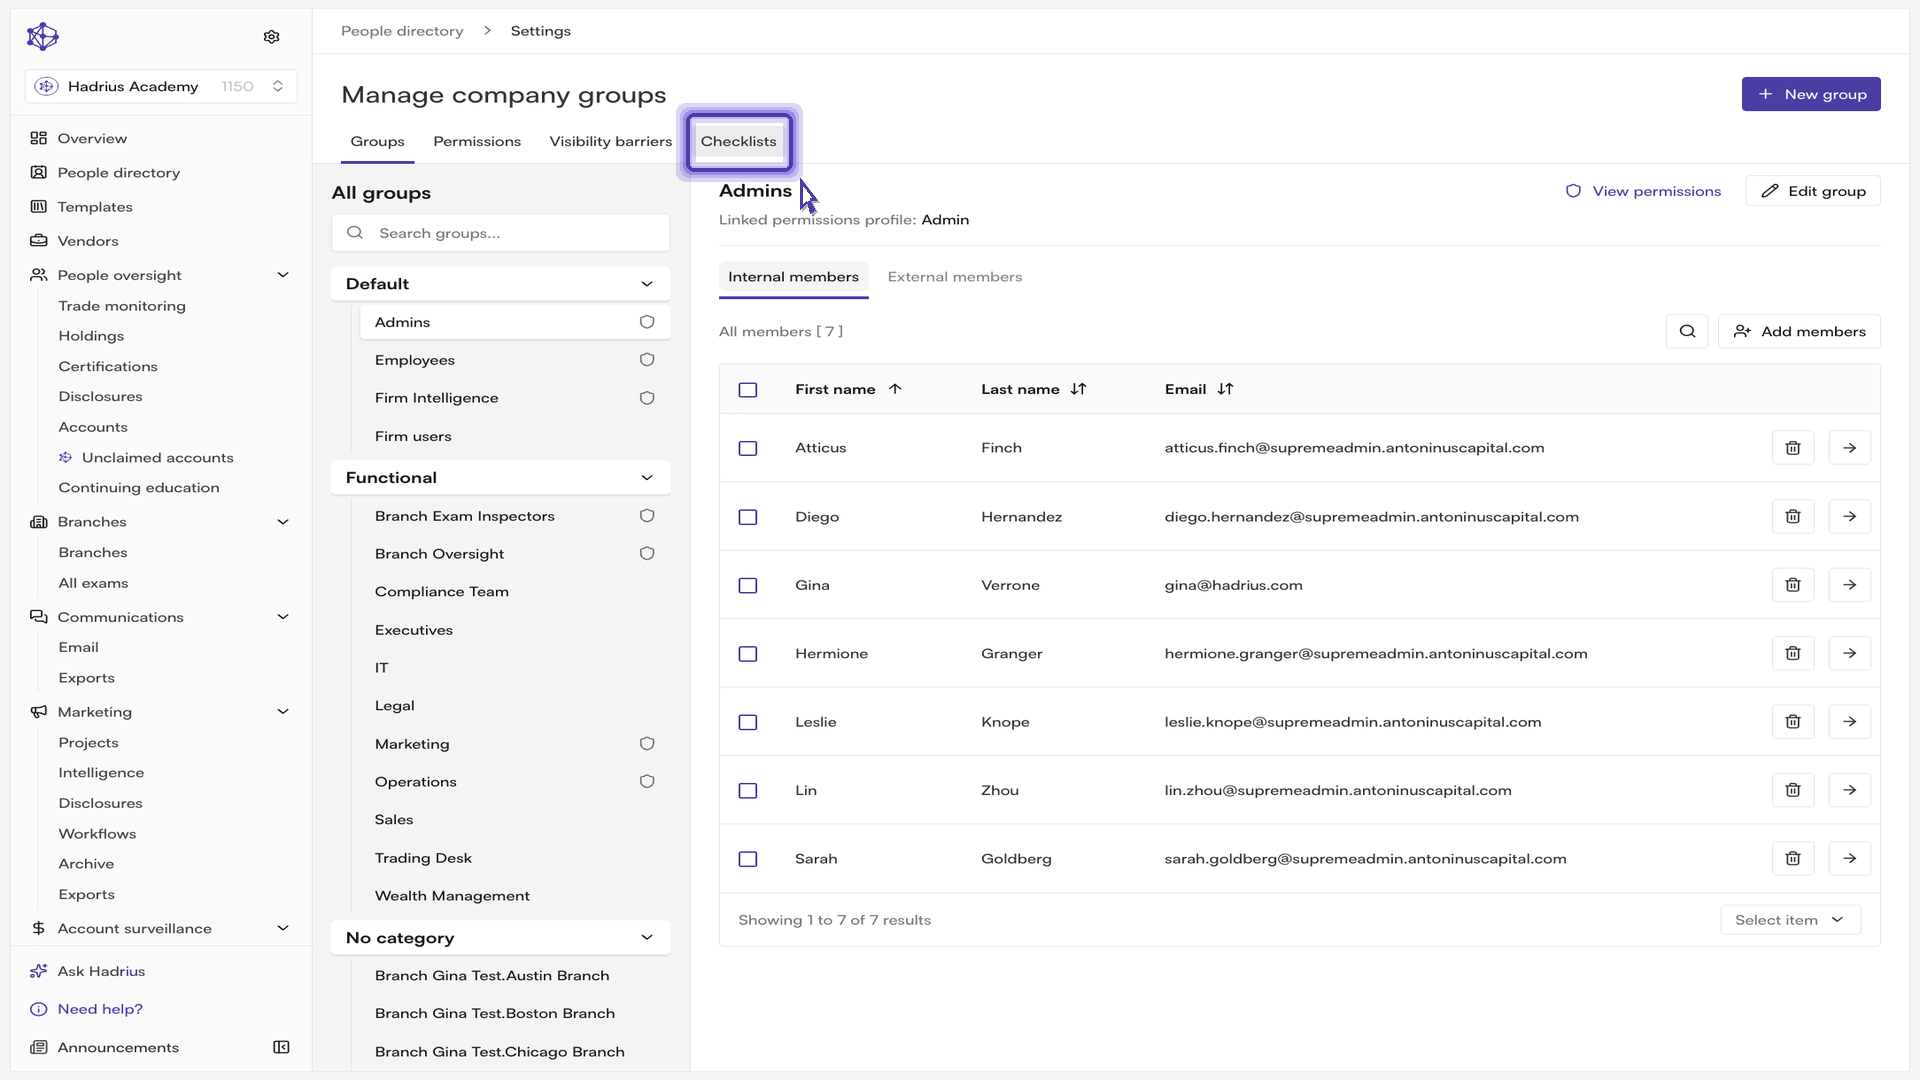
Step 1: Open the Checklists tab
From the people directory, open Settings. This page holds the tabs where onboarding requirements get defined: Groups, Permissions, and Checklists (plus Visibility barriers, if your firm uses information barriers). Select the Checklists tab to see every onboarding checklist your firm has built.
Step 2: Create the checklist
Select Create new checklist in the top right. A blank checklist form opens.
Enter a Checklist Name. Choose something descriptive — this is the name you will pick from later when you attach the checklist to a group, and it is the name shown on the group's record.
Optionally select Require full employee profile and Require brokerage account connection. These are baseline onboarding requirements that apply in addition to any templates you choose.
Step 3: Add certifications and disclosures
The Certifications and Disclosures sections are where you choose the tasks that are automatically assigned to everyone in the group this checklist is attached to. Use the "Choose a certification..." and "Choose a disclosure..." pickers to search and select templates; each selection is added to a list below the picker, and you can add as many as you need. To remove one, select the X next to it.
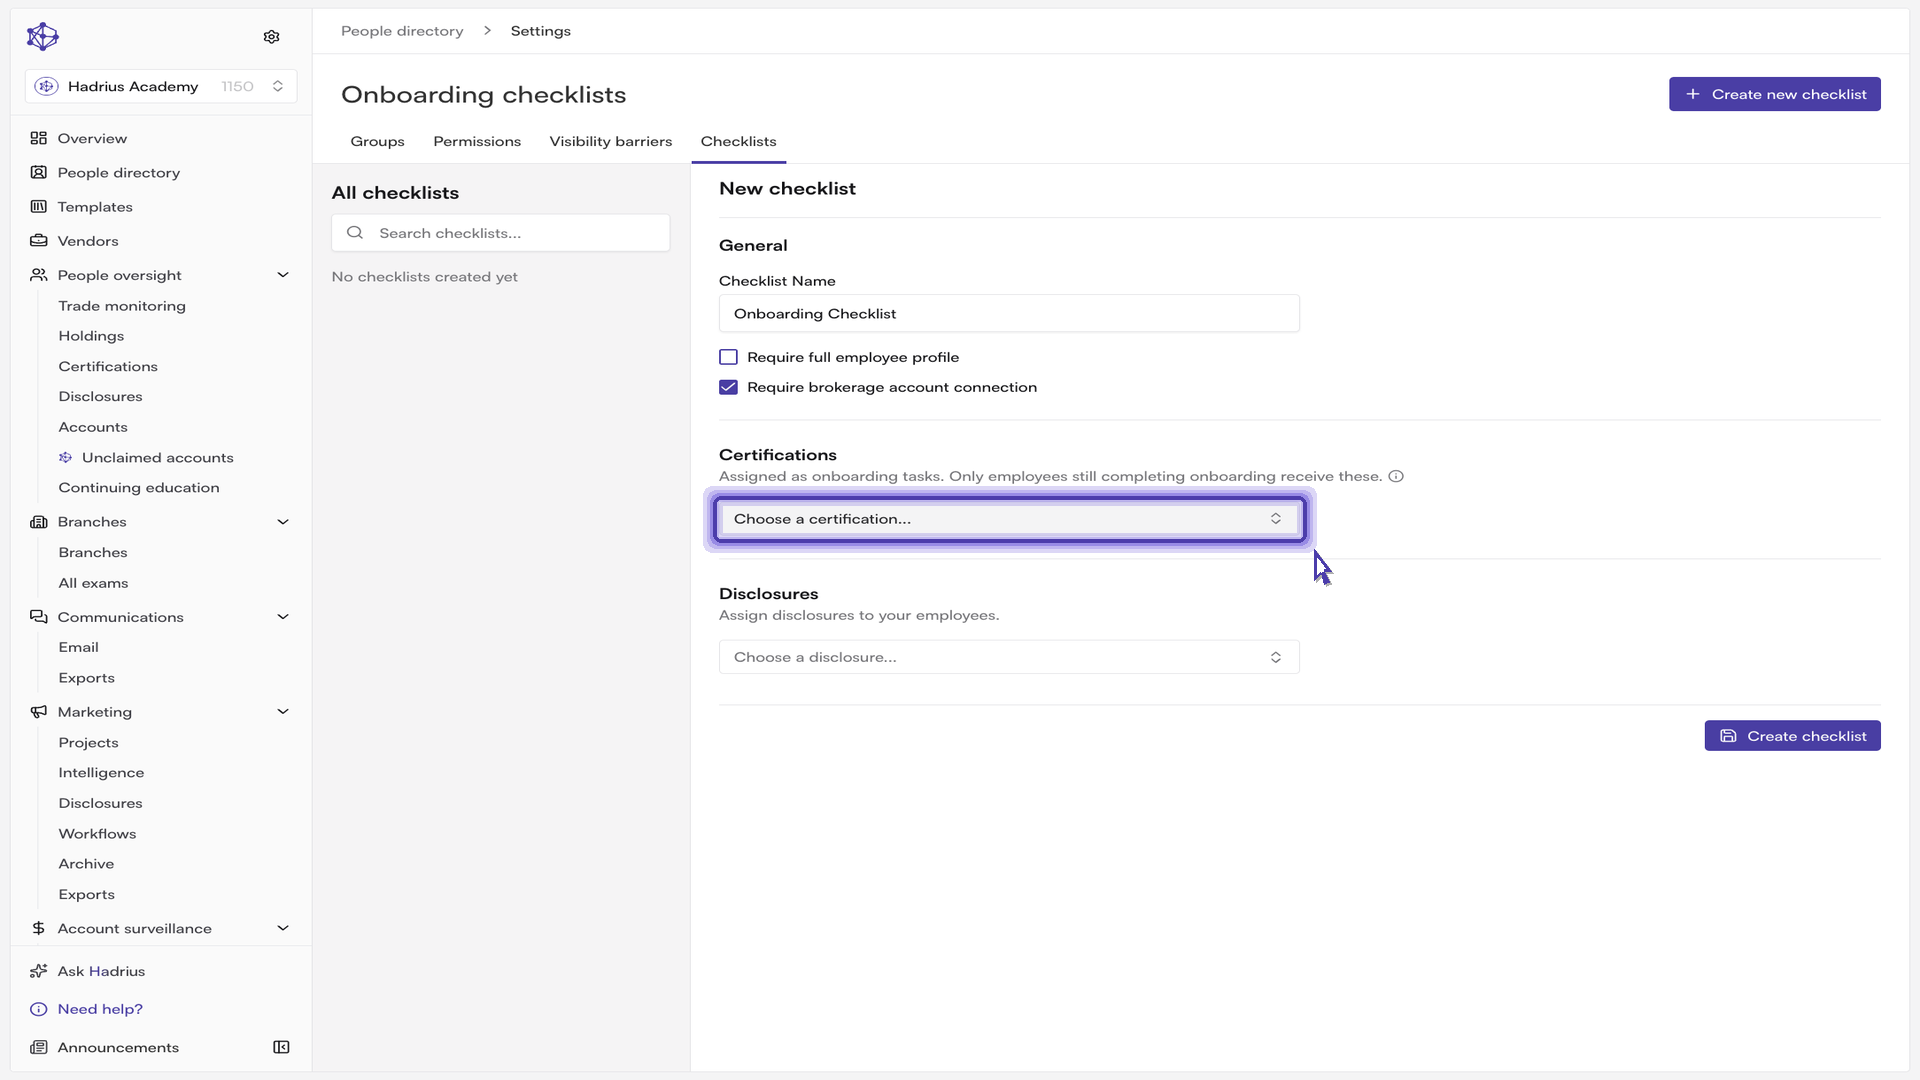
Two things to keep in mind:
Only published templates appear in these pickers. A template still in draft, or one that has been archived, will not be offered.
Certifications on a checklist are assigned as onboarding tasks. Employees who are still completing onboarding — including future new hires — receive them; anyone who has already finished onboarding is skipped. If you need to reach everyone, use a one-time certification campaign instead.
A checklist must contain at least one certification, disclosure, or requirement before it can be saved. Once your selections are set, select Create checklist.
Step 4: Create a group and link the checklist
A checklist does nothing on its own — it needs a group to attach it to. Groups are how you apply one set of requirements to many people at once.
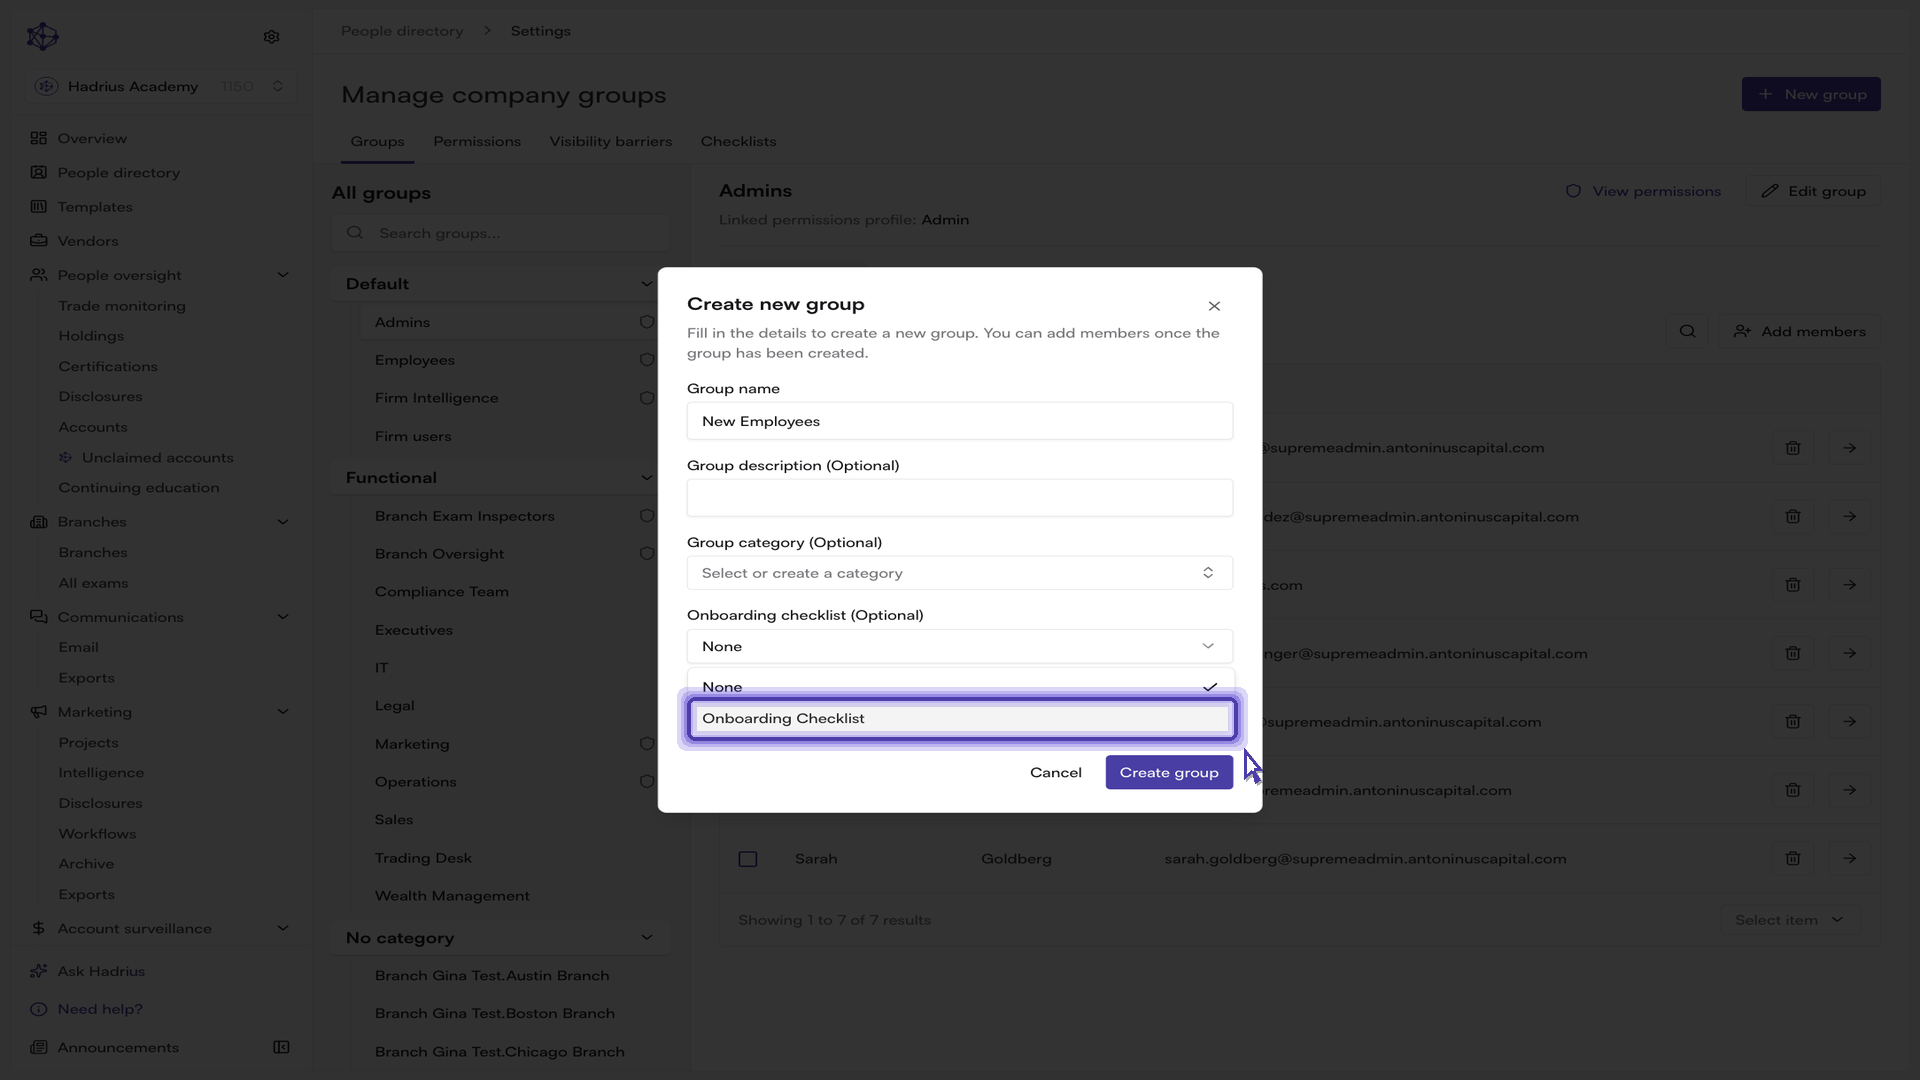
Switch to the Groups tab and select New group.
Enter a Group name that reflects who belongs in it, plus an optional description and category.
Under Onboarding checklist, select the checklist you just built. Each group carries a single checklist, which drives the initial assignments for its members.
If you also want a permissions profile tied to this group, turn on the permissions profile option before saving.
Select Create group.
Step 5: Add members
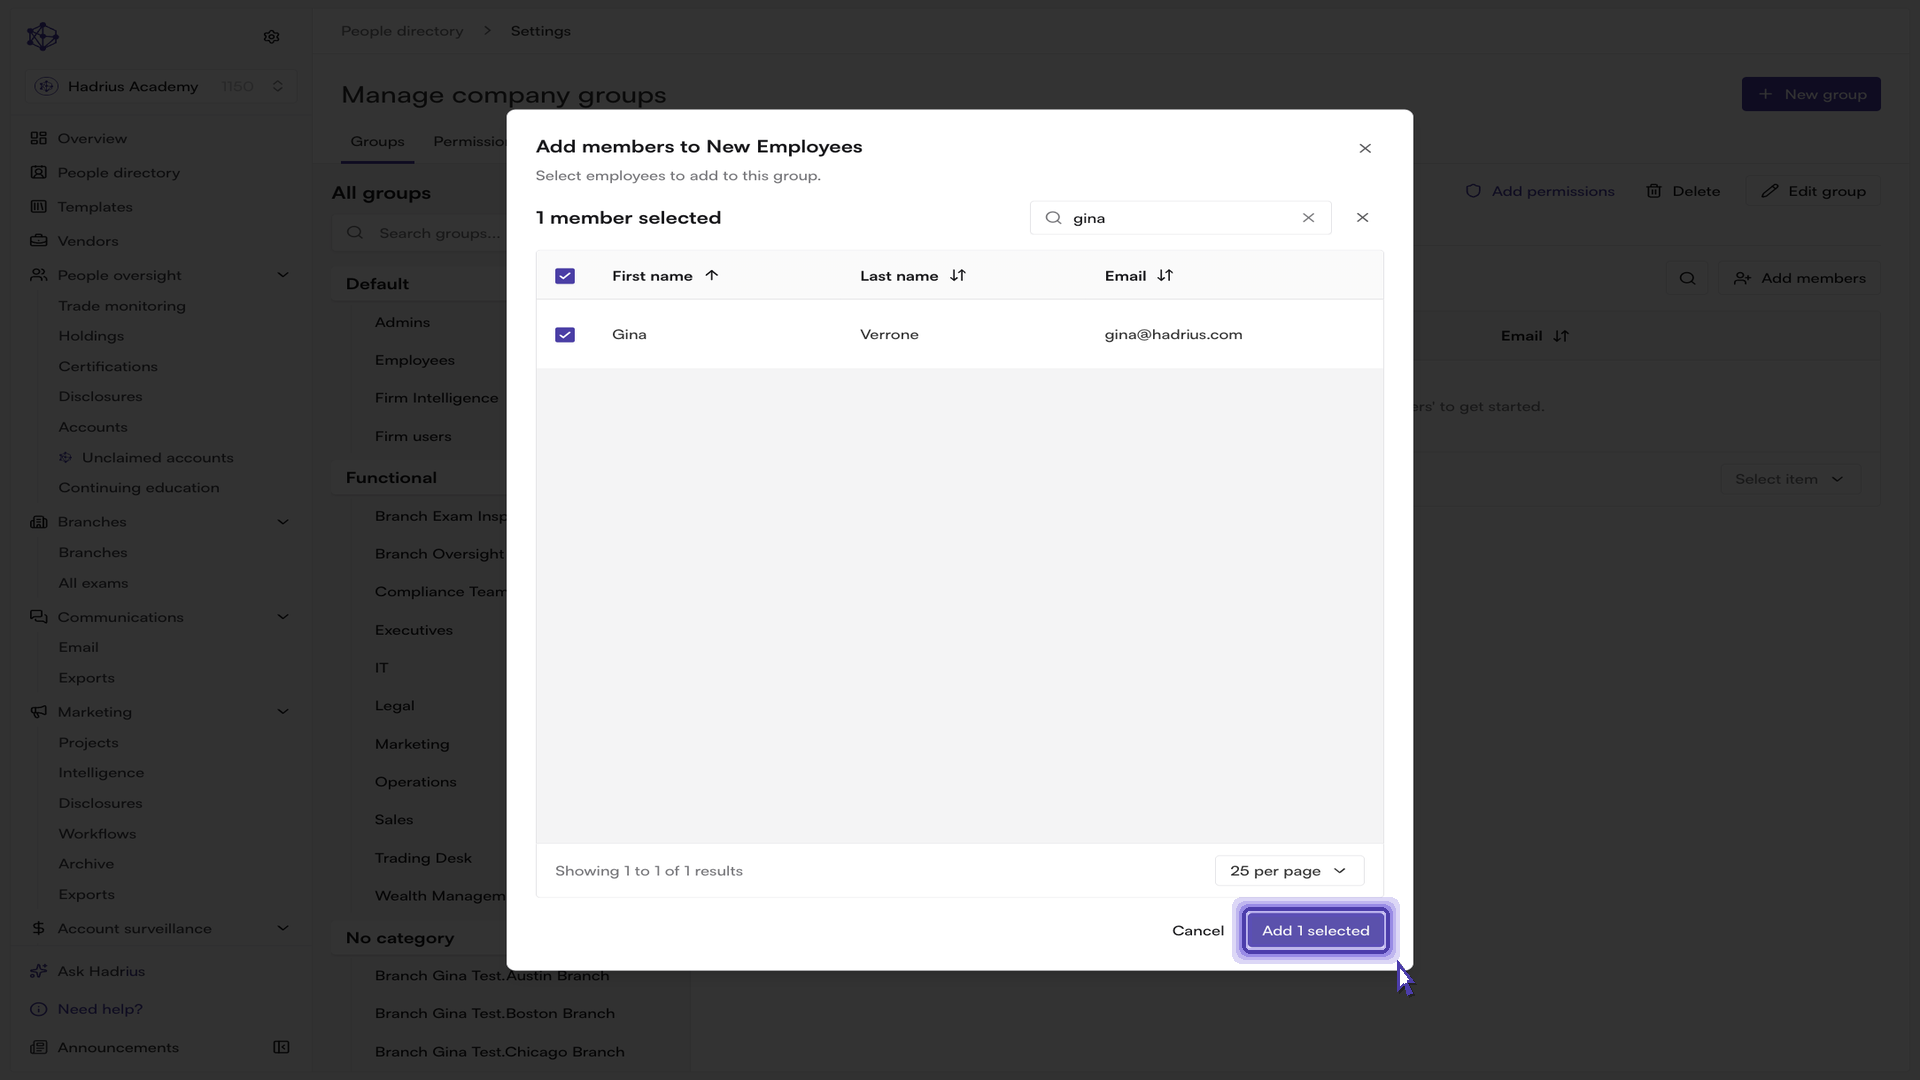
With the group created, open it and select Add members. Search by name or email to find the right people, select them, and confirm with the add button. Adding an employee to the group immediately assigns that checklist's tasks to them, and you can add more members at any time.
The group's detail view now shows exactly which onboarding checklist it is enforcing, with a link straight through to the checklist if you need to review or edit it.
Step 6: Confirm from the employee's side
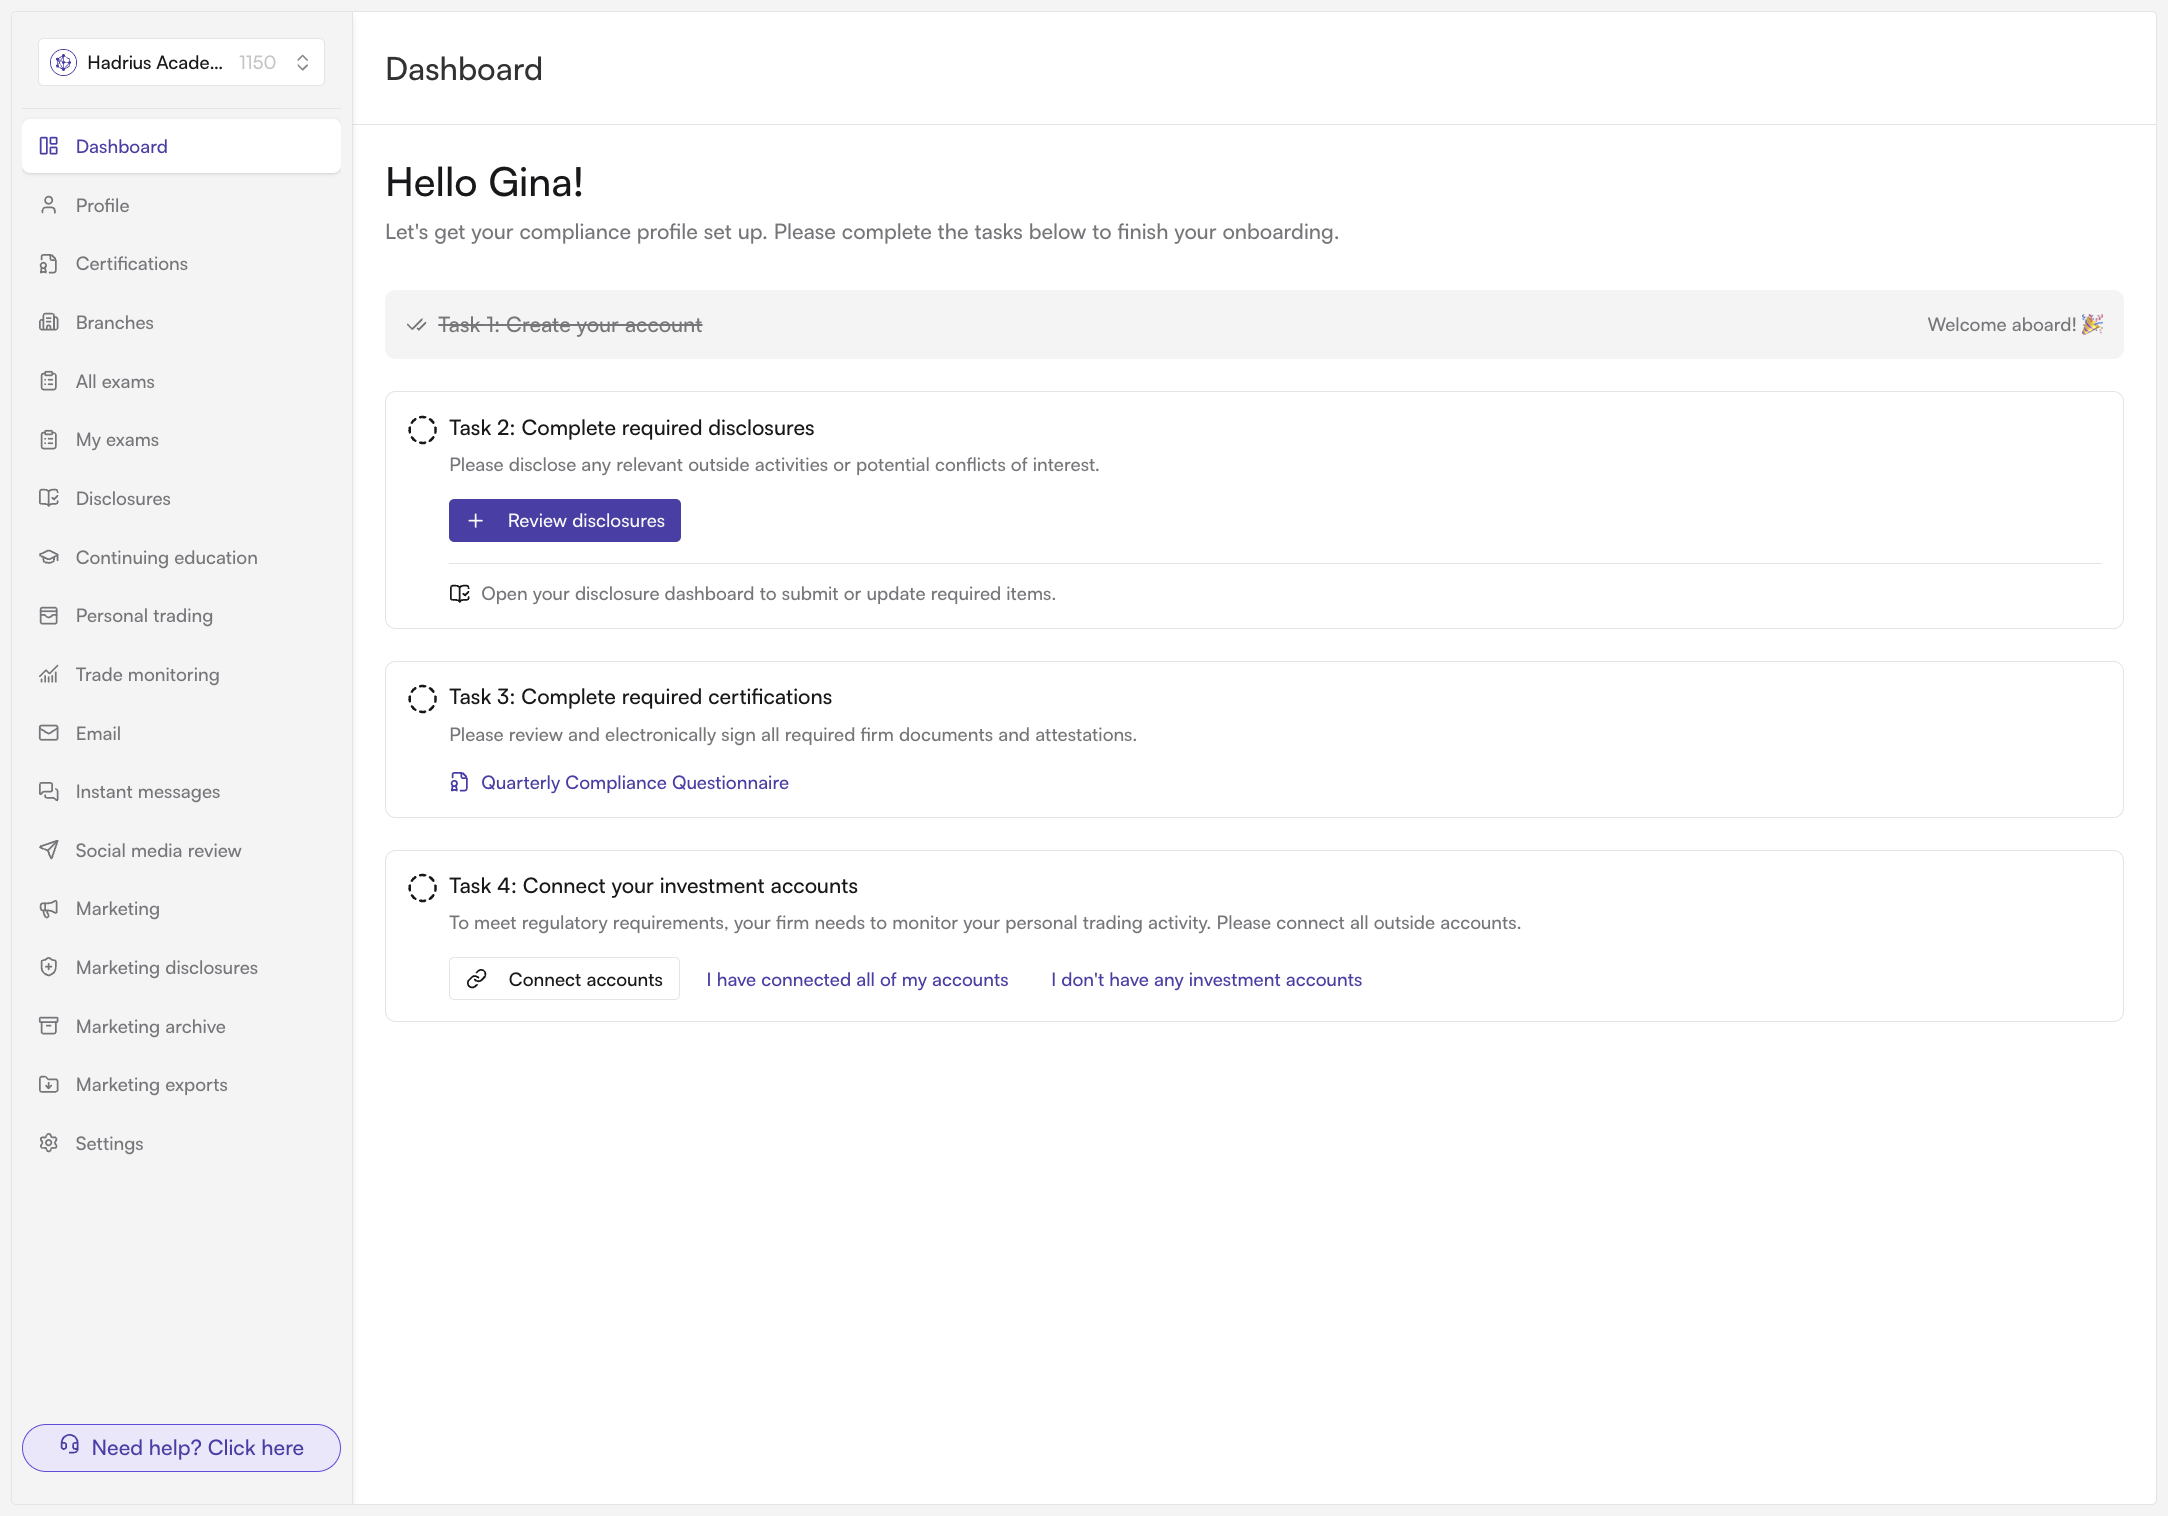
To verify everything is wired up correctly, preview the experience as one of the employees you just added. Their onboarding view will show the assigned tasks waiting for them — the certifications and disclosures from the checklist, along with any profile or account-connection requirements you enabled.
What happens next
From this point on, anyone added to the group automatically receives the checklist's tasks, so new hires are covered without extra setup. If you later change which checklist a group uses, the platform asks whether to apply the new checklist to employees already in the group or to new members only — choose based on whether existing members still need those requirements. Edits to the checklist itself are picked up for future assignments, so keeping the checklist current is usually easier than reassigning tasks by hand.