How to add a new document to an existing marketing project
Last updated: October 17, 2026
Use this workflow when a marketing project that's already underway needs an additional file attached — for example, a new draft, supporting exhibit, or related piece of content that wasn't part of the original submission. Adding a document to an existing project keeps all related materials organized together under a single project workspace instead of scattered across separate submissions.
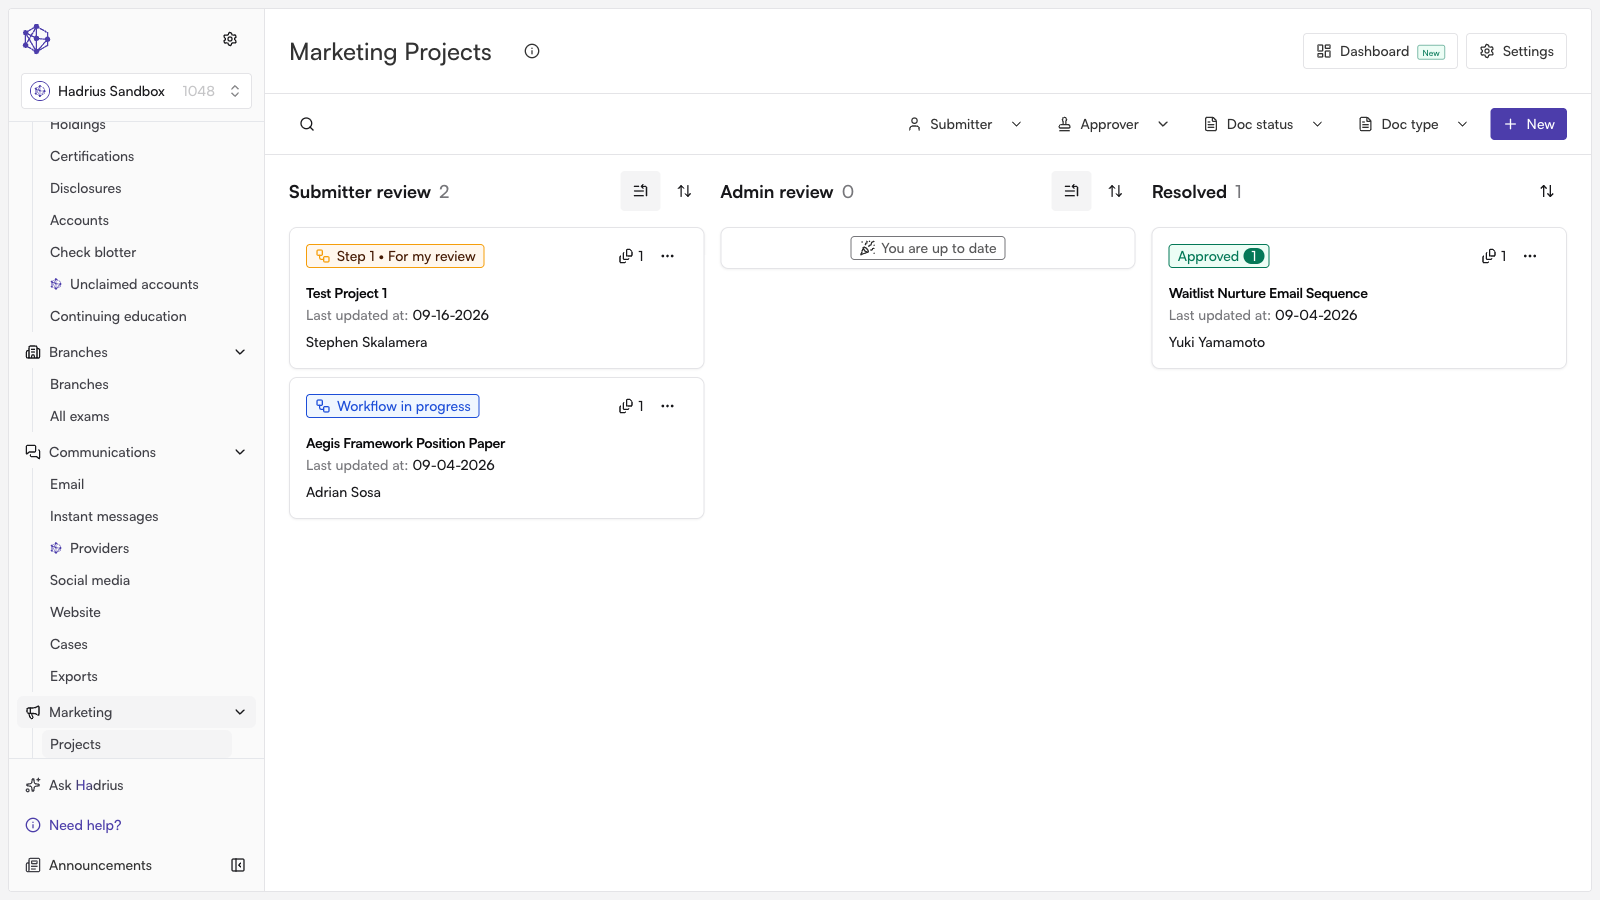
Step 1: Open the project
From the Marketing Projects list, find the project you want to add a file to and open it. This brings you into that project's workspace, where all related documents, artifacts, and workflow activity live together.
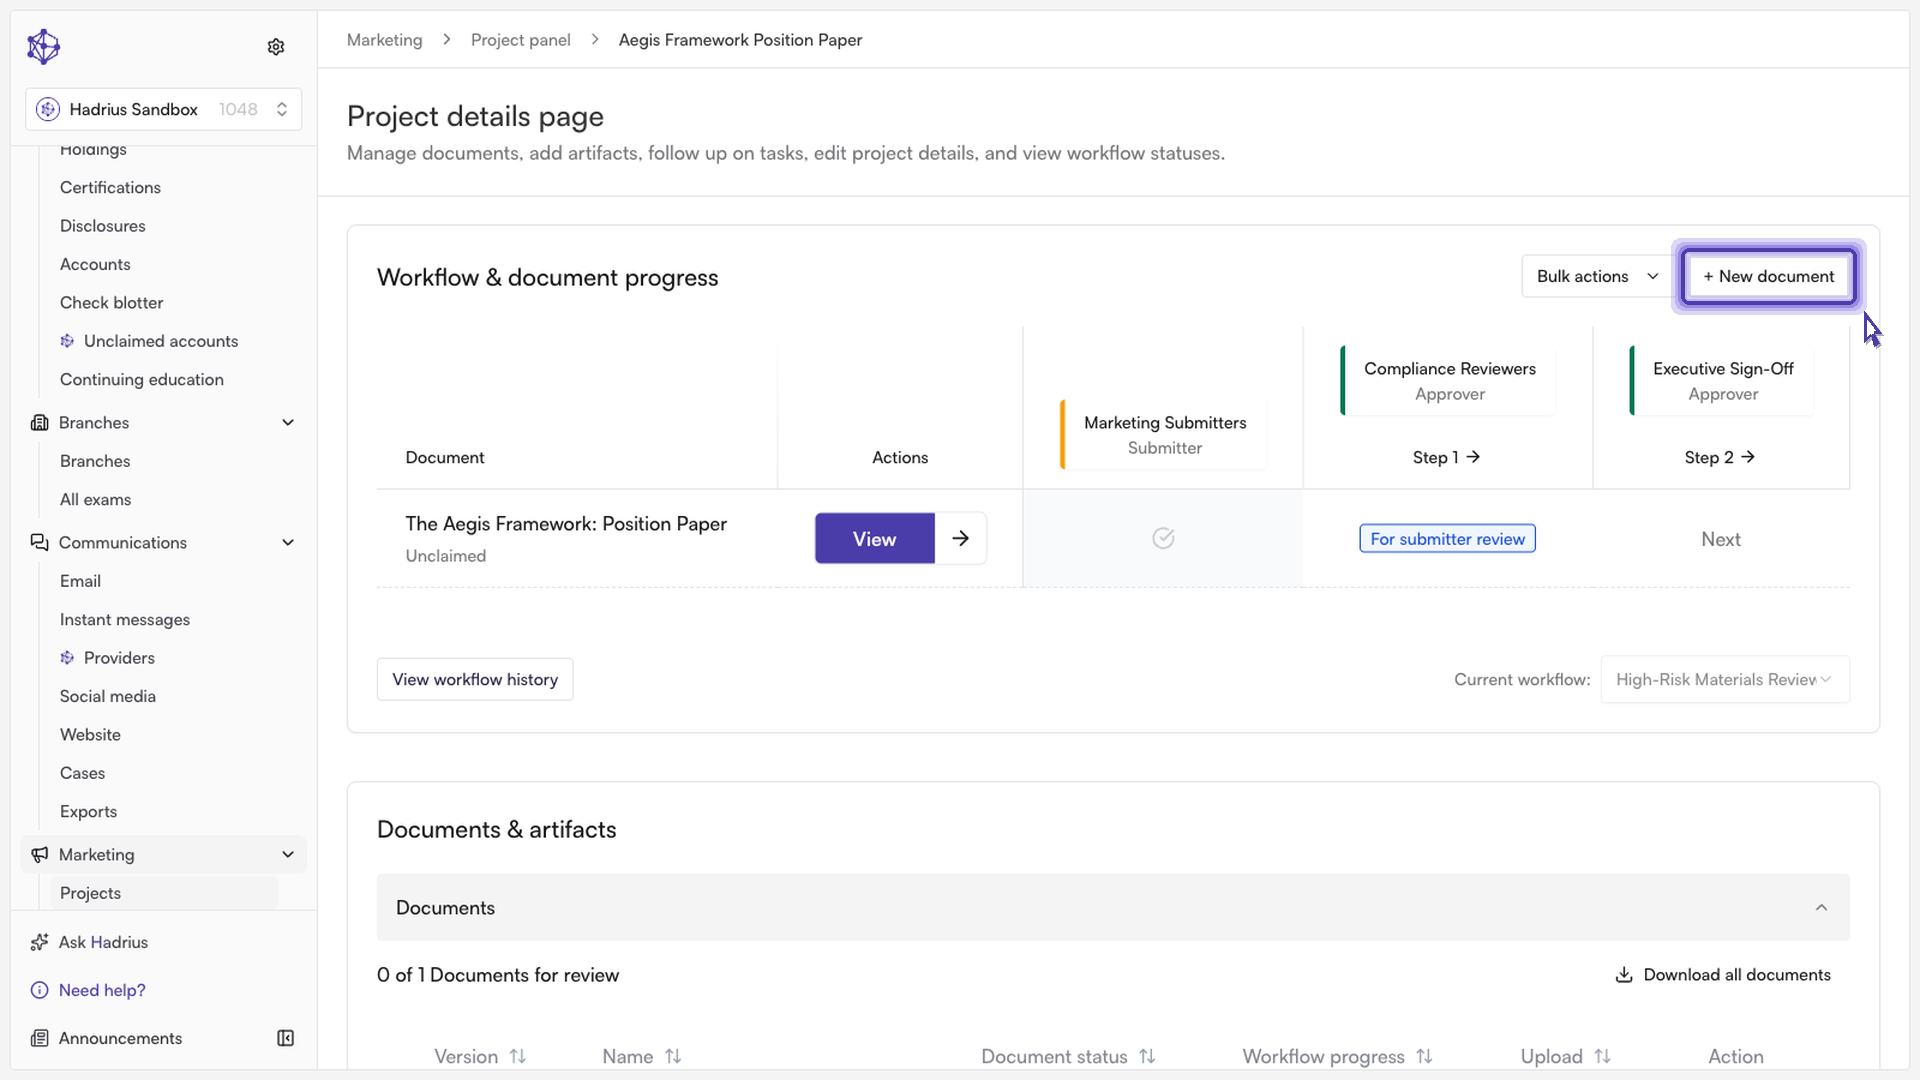
Step 2: Start adding a new document
Within the project workspace, the "Workflow & document progress" section lists every document currently attached to the project. Click "+ New document" to begin attaching a new file. (If the project's workflow is inactive, this button is disabled.)
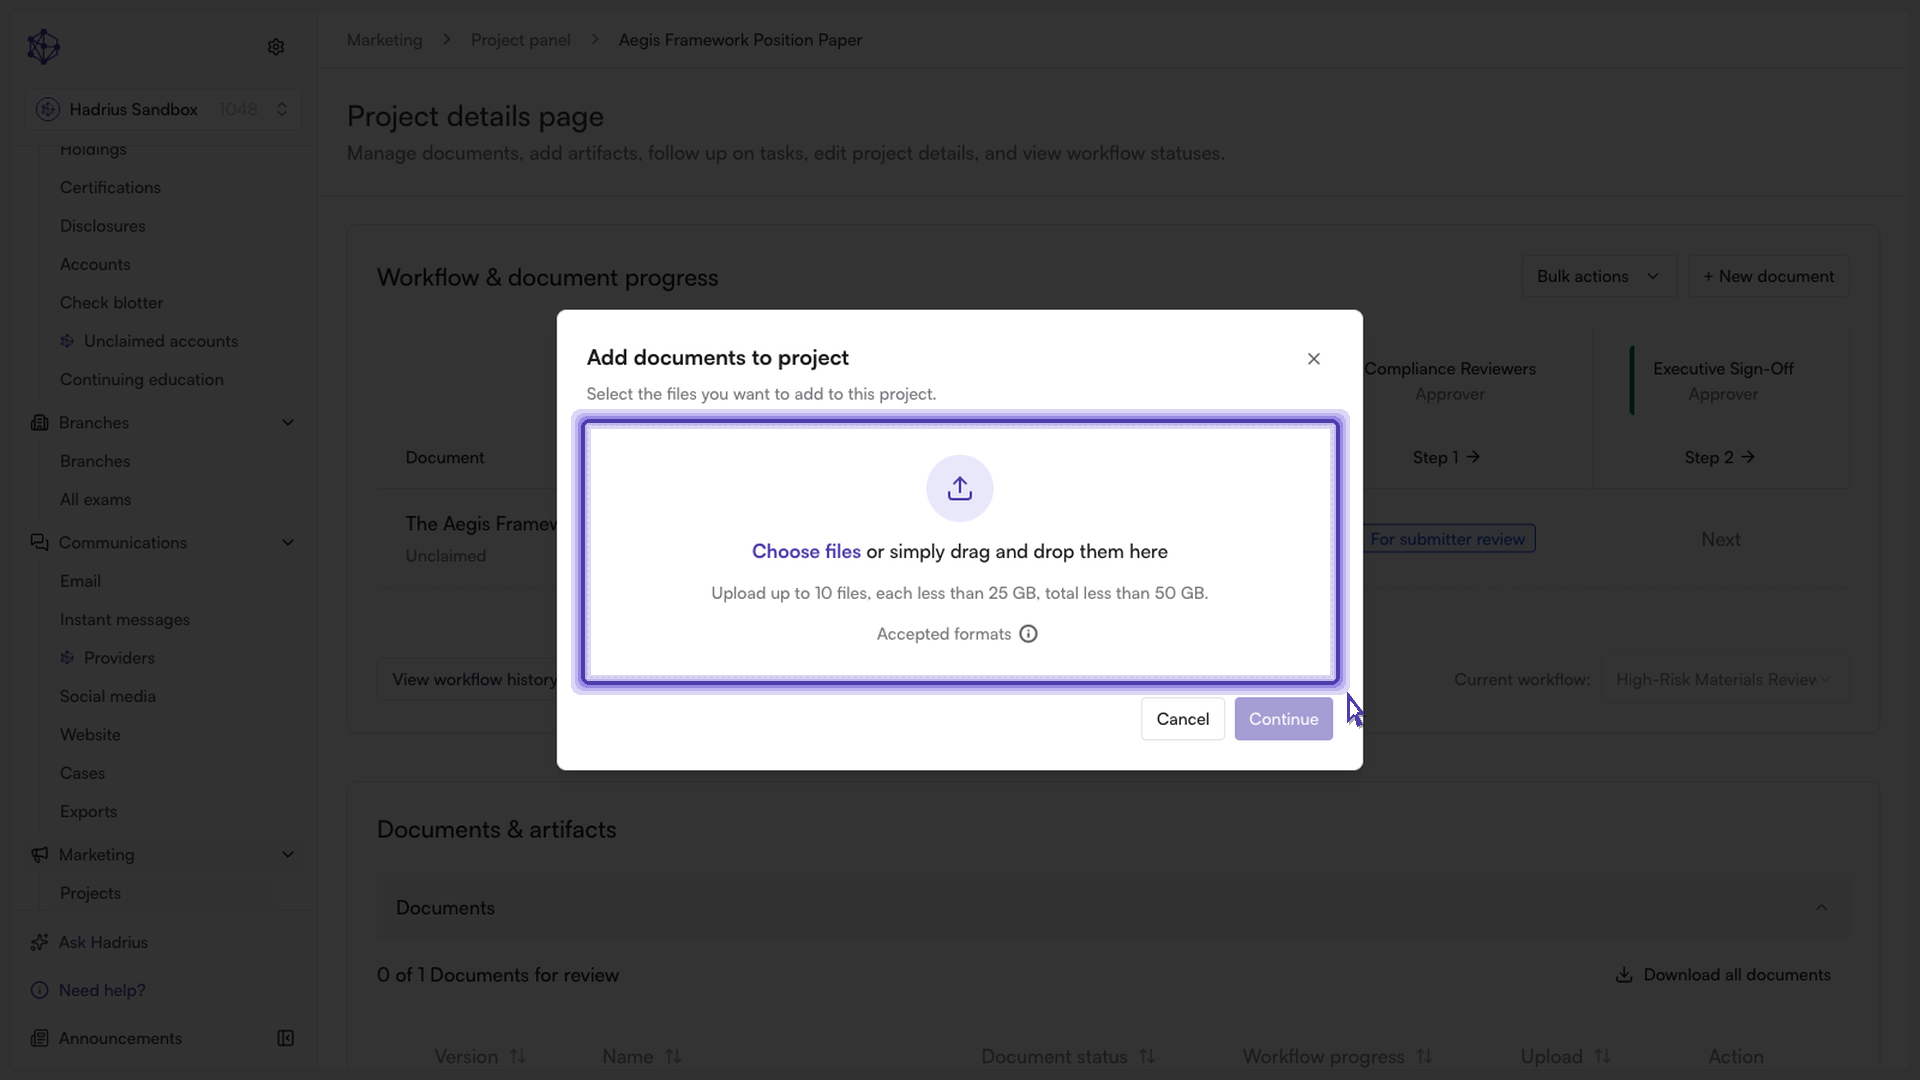
This opens a file selection dialog titled "Add documents to project." Here you upload one or more files from your device rather than creating something from scratch — you can select multiple files at once, subject to the project's file count, per-file size, and total size limits.
Step 3: Set the document details
Once your files are selected, a "Document details" panel opens so you can enter the information needed for AI review. If you've added multiple files together, these settings apply to all of them at once (each file still keeps its own name, taken from the original filename unless you've turned on human-readable naming in your saved preferences).
Document type — Use the "Document type" dropdown to classify the file (for example, as a whitepaper) so it's grouped and tracked alongside similar content.
Due date — Use the "Due date" picker to put the document on a timeline. If left unset, it defaults to today's date; it also cannot be set in the past.
Date of use (optional) — An optional second date field for when the content will actually be used, separate from the review due date.
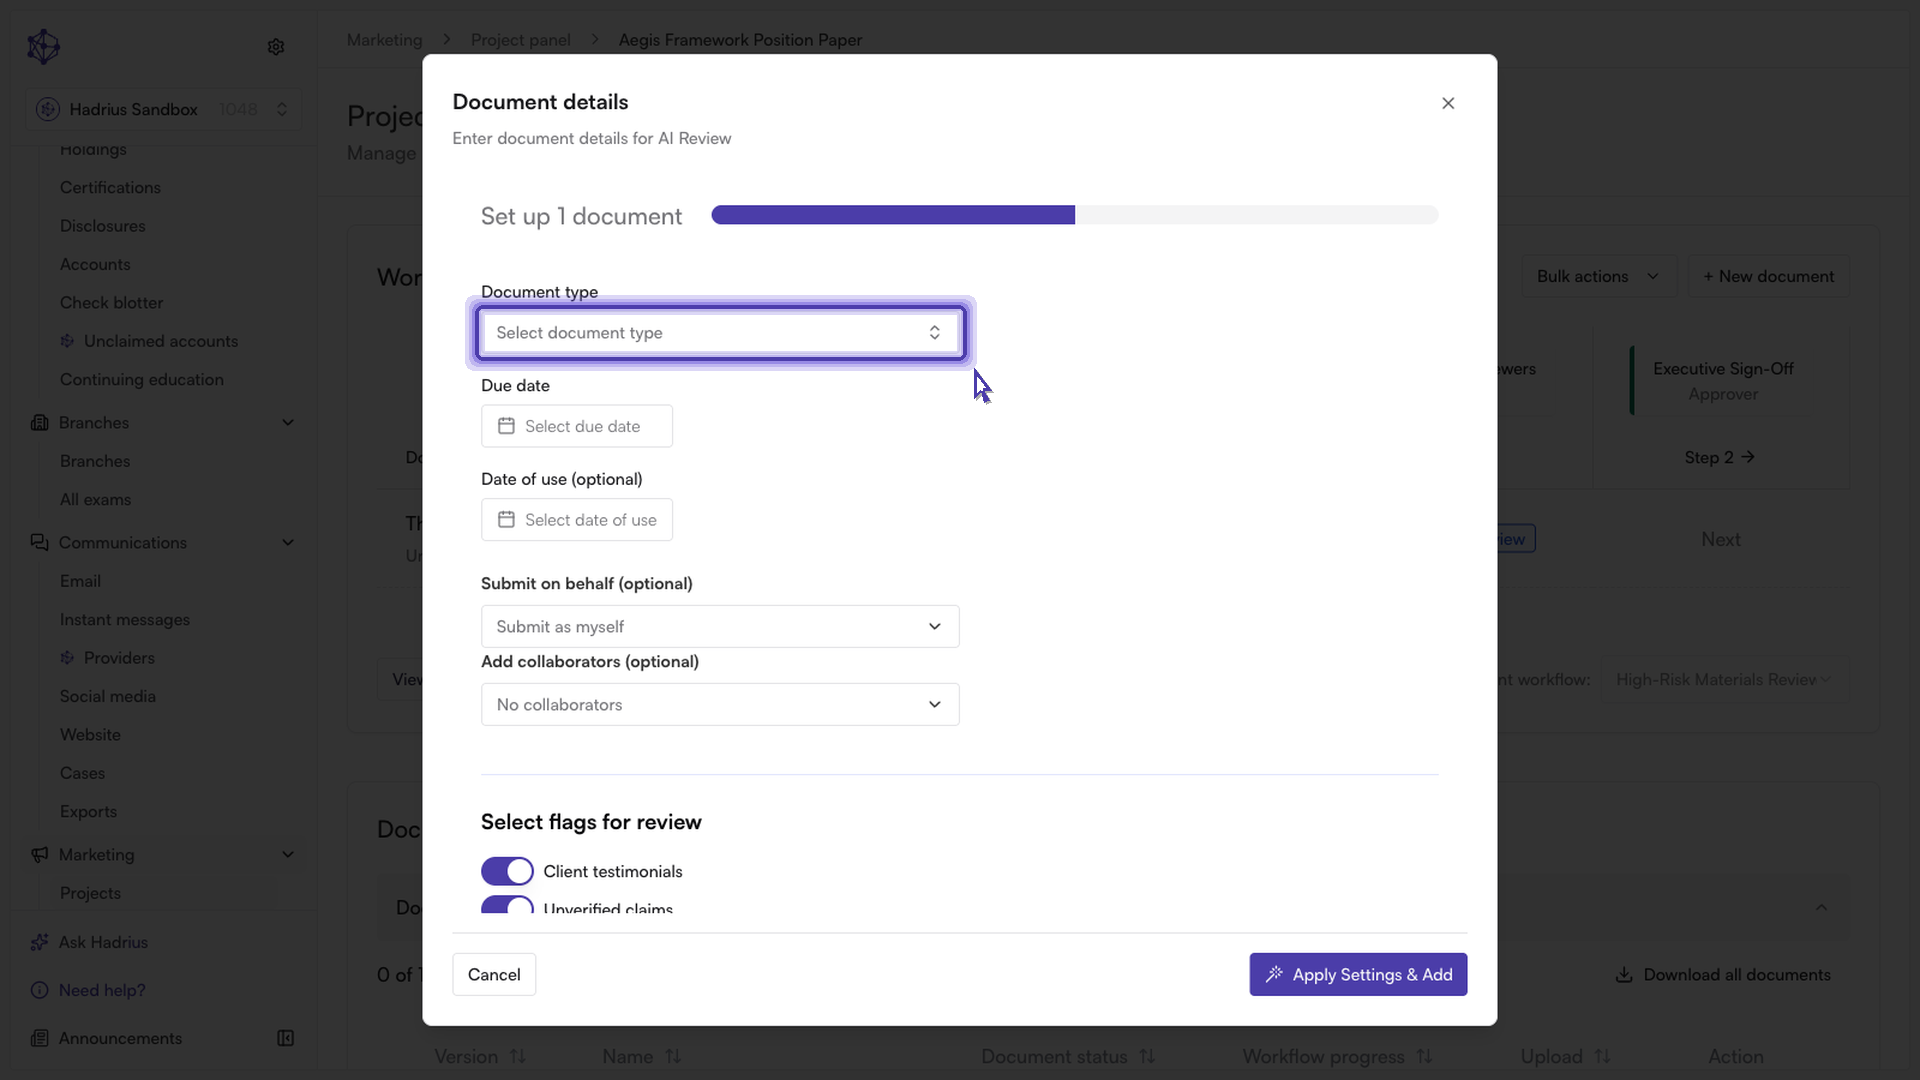
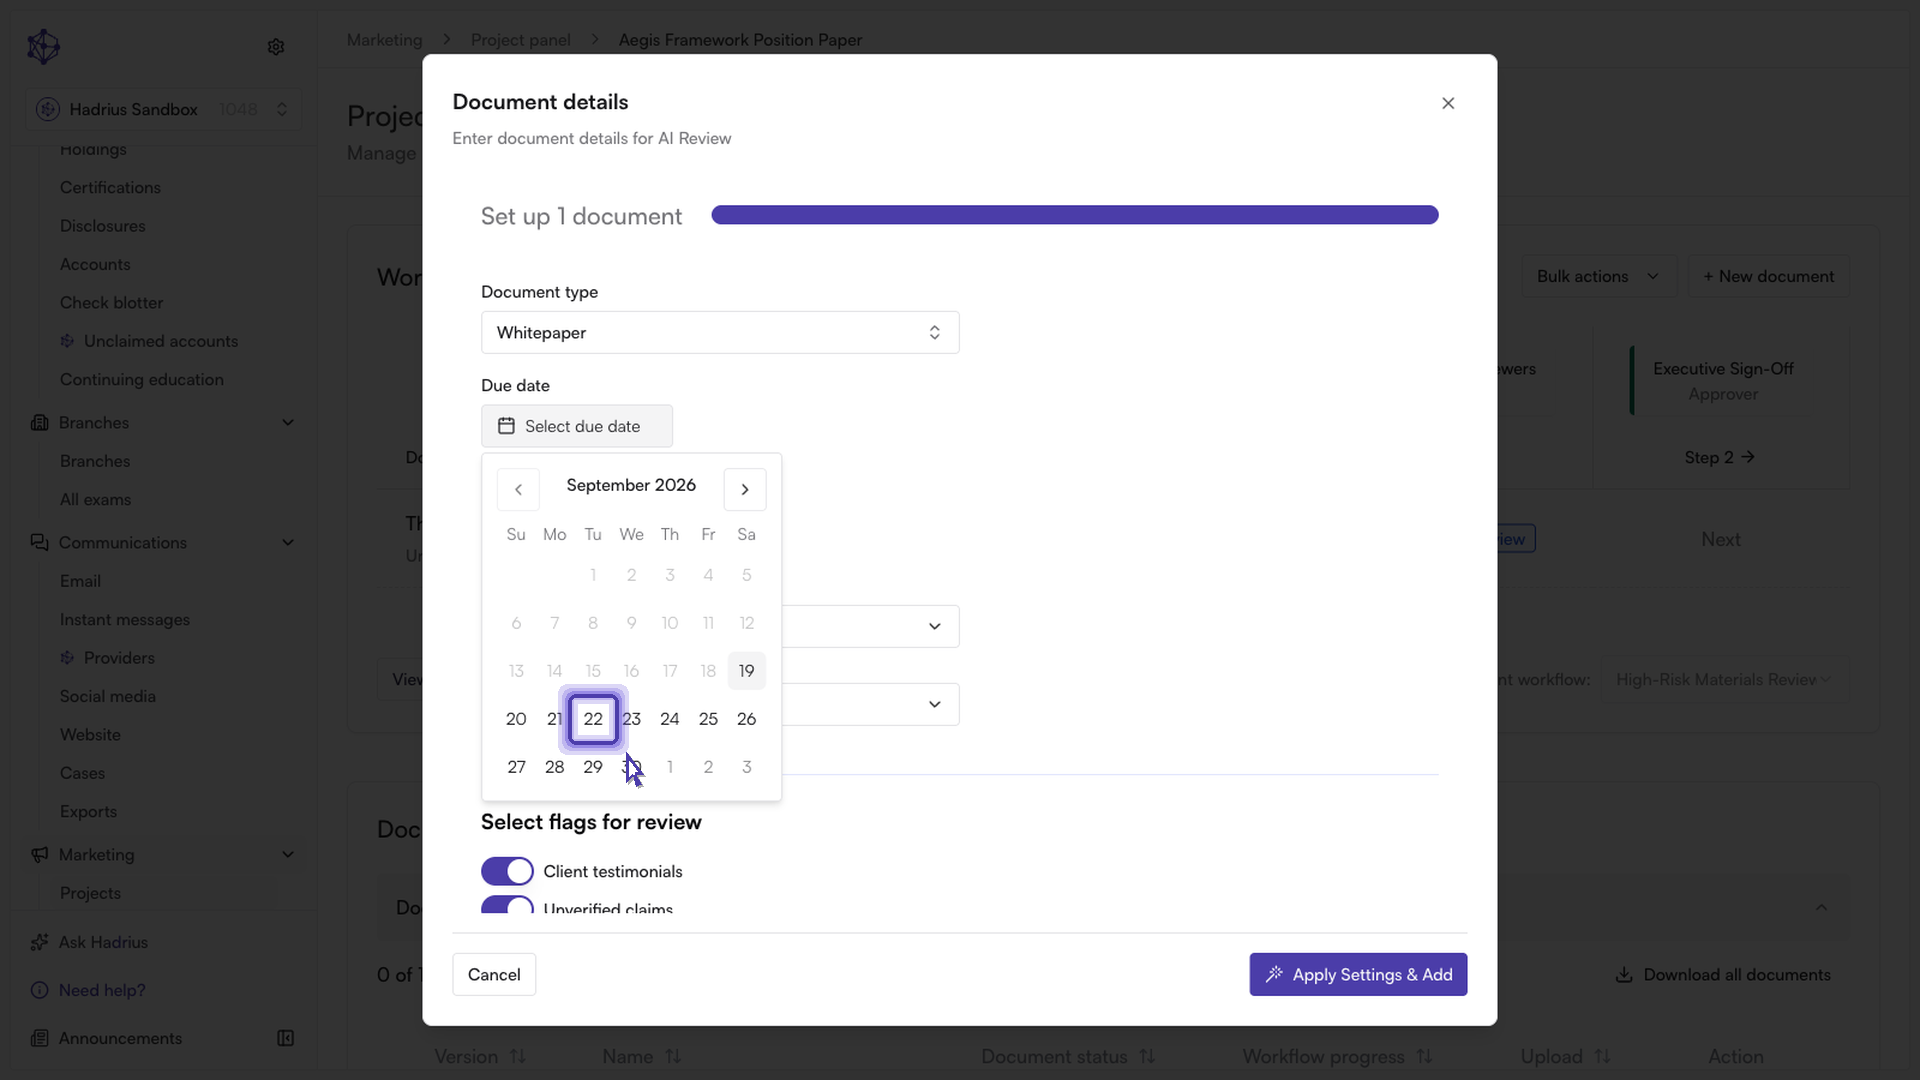
Depending on your project's configuration, you may also see fields for submitters, collaborators, additional context questions, auto-resubmit preferences, or compliance flags. Any required questions must be answered before you can continue — the submit buttons stay disabled until they are.
Step 4: Add the document
When everything looks right, click "Apply Settings & Add" to upload the file(s) to the project and apply the details you entered. If you have previously saved default settings, an "Add with Defaults" option also appears, which adds the files using your saved defaults instead of the values entered in this dialog.
You'll see per-file upload progress while the files transfer, followed by a confirmation once the document(s) have been added successfully. The new document then appears in the project's document list, ready to move through the review workflow.