How to correct how a policy's sections were parsed
Last updated: October 17, 2026
When a policy is uploaded, Hadrius reads its table of contents and headings automatically to build the section structure used throughout the platform — for control linking, reporting, and navigation. Occasionally a document's formatting confuses this automatic read: a table of contents entry gets treated as its own section, a lettered appendix is read as a top-level division instead of a sub-section, or a heading ends up nested at the wrong level. When that happens, you can correct how the structure was read without touching the underlying document itself.
Opening the section correction tool
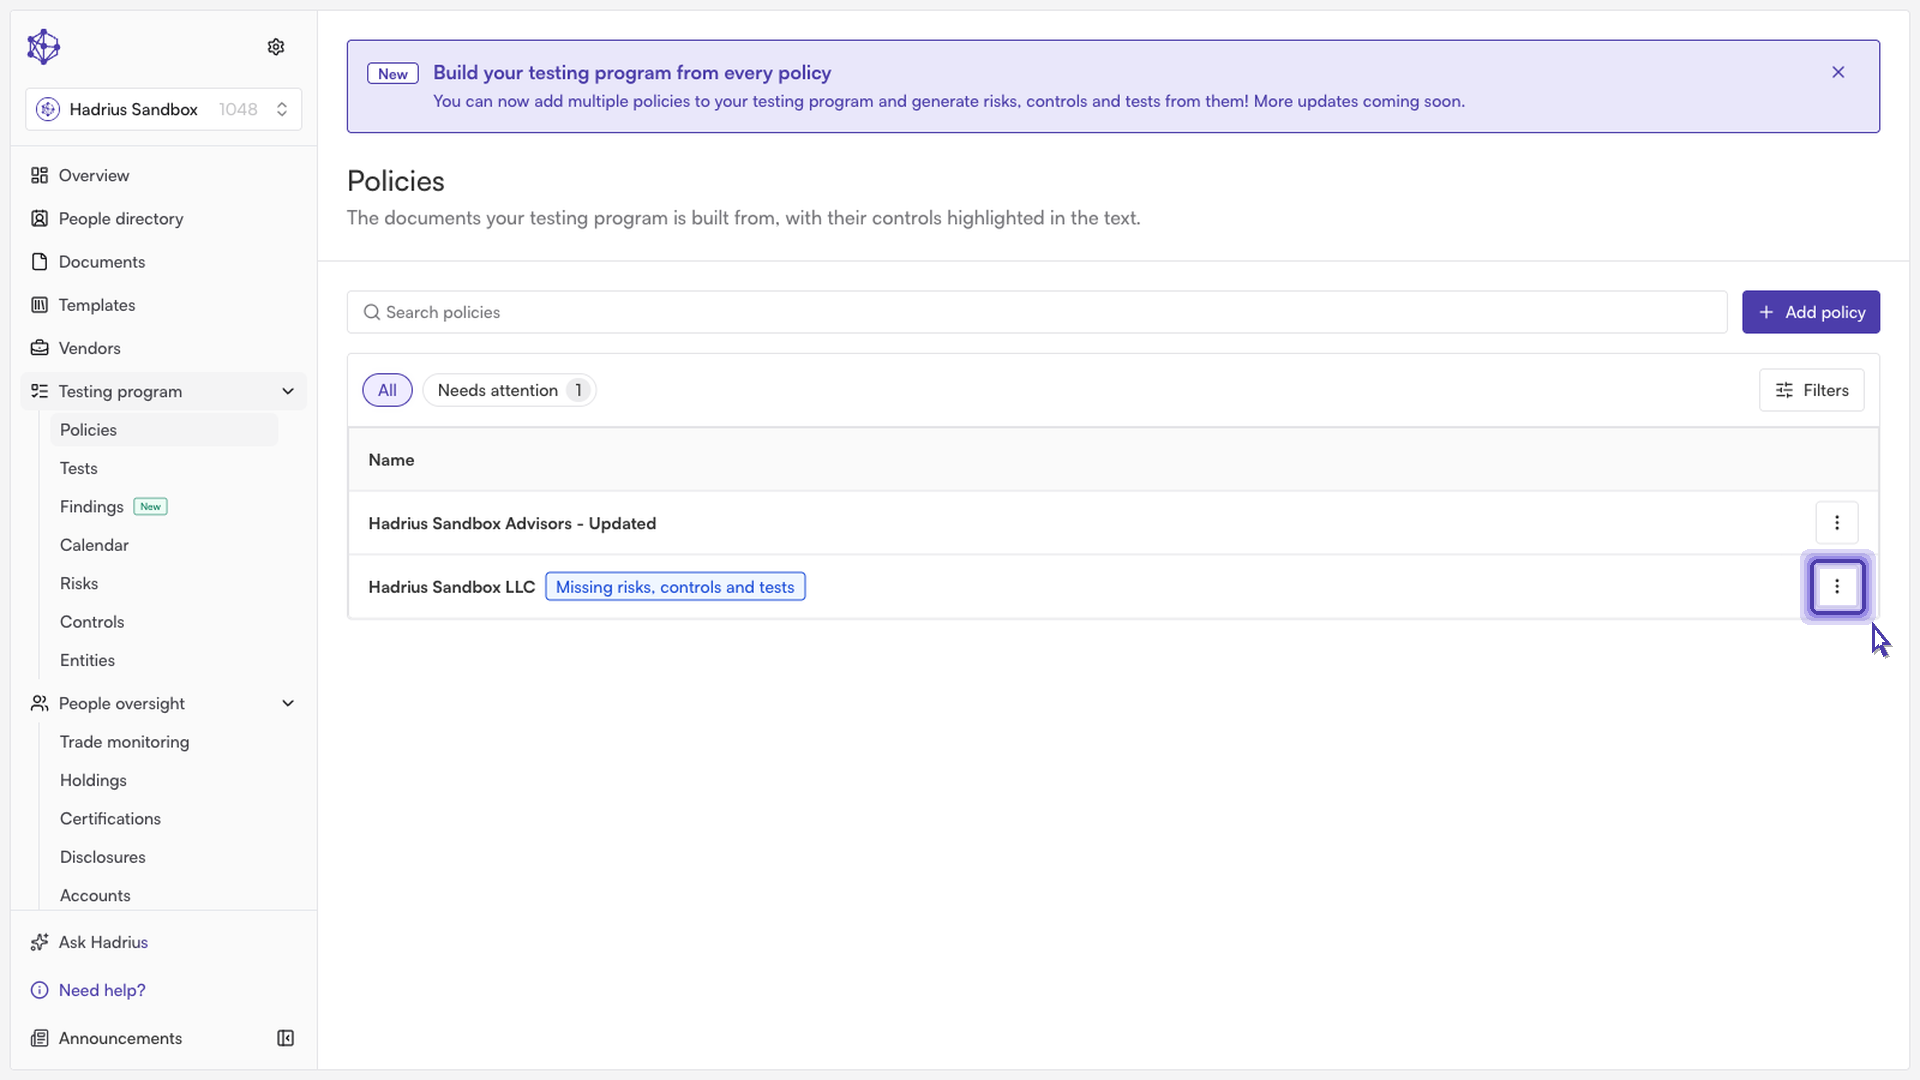
From the policy list, find the policy whose structure needs fixing and open its actions menu (the "⋮" button next to the policy). This menu gives you access to the policy's parsing and structure tools.
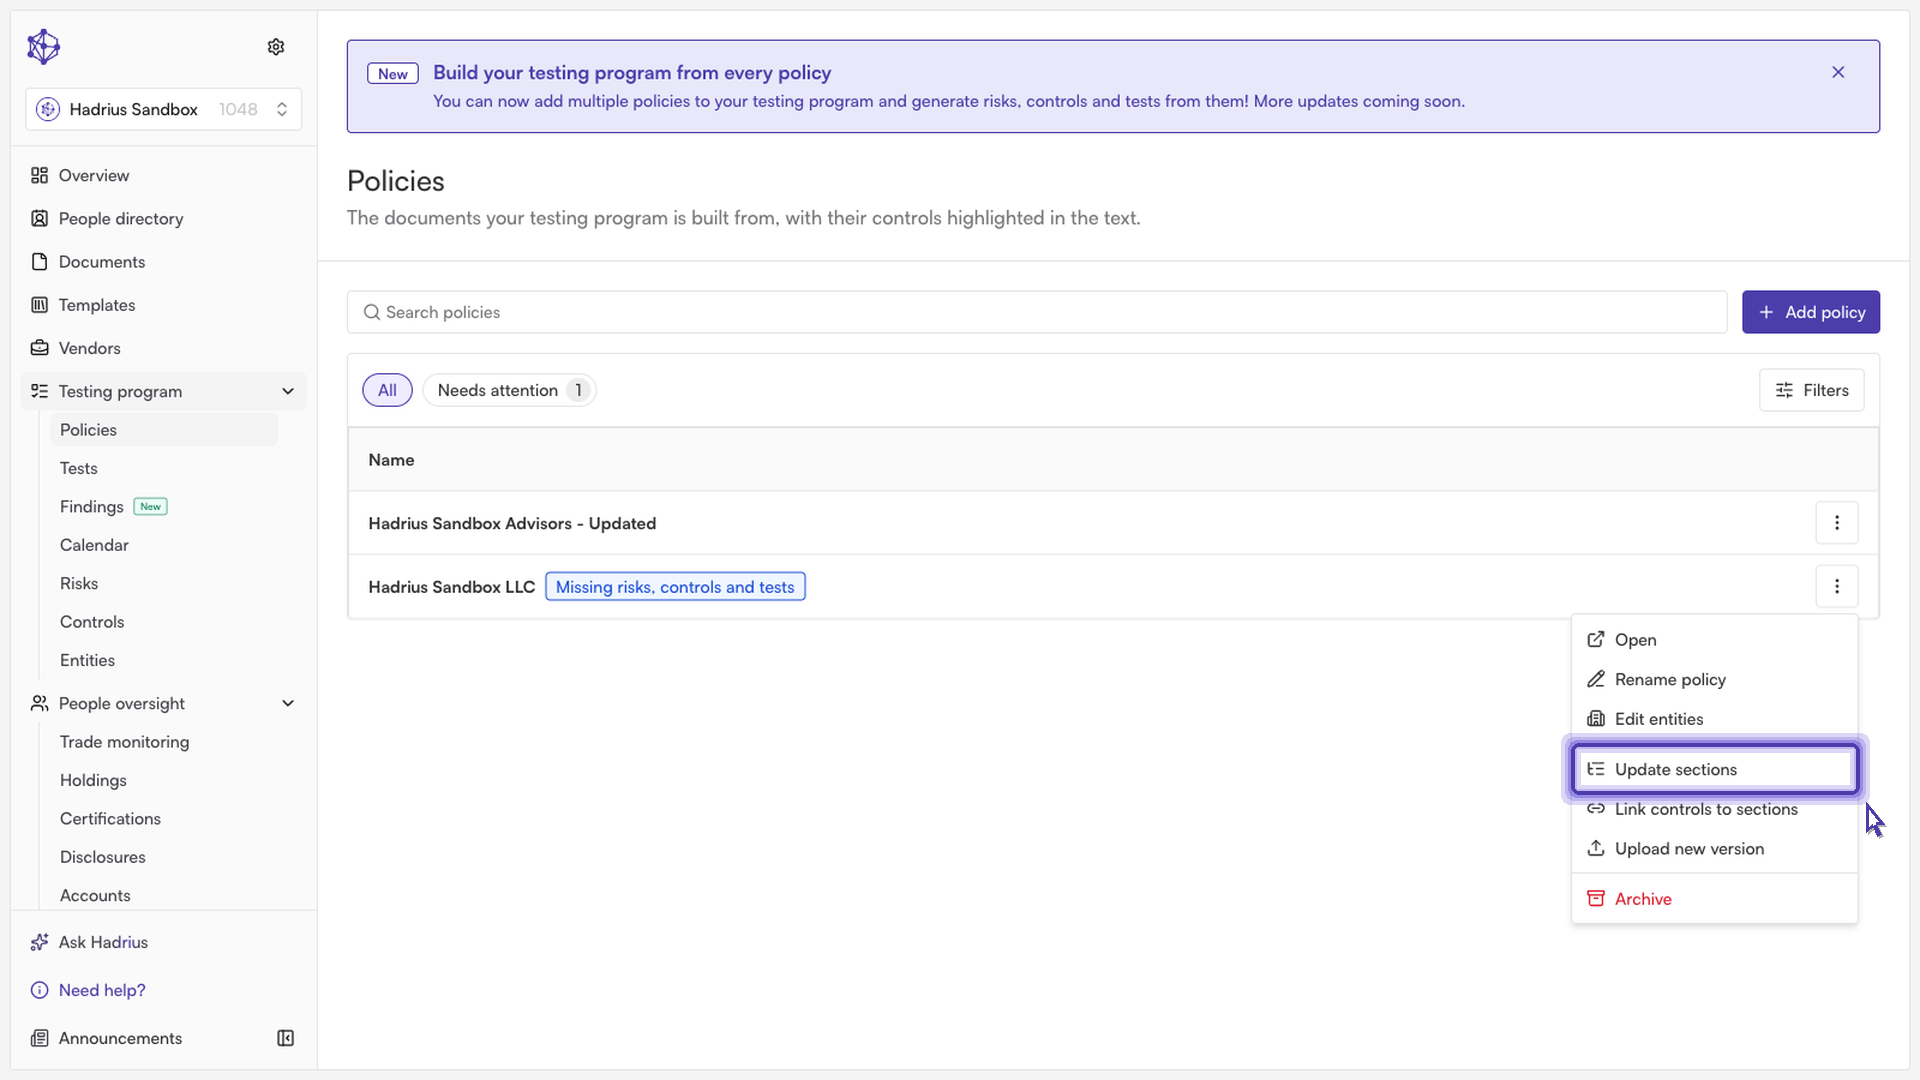
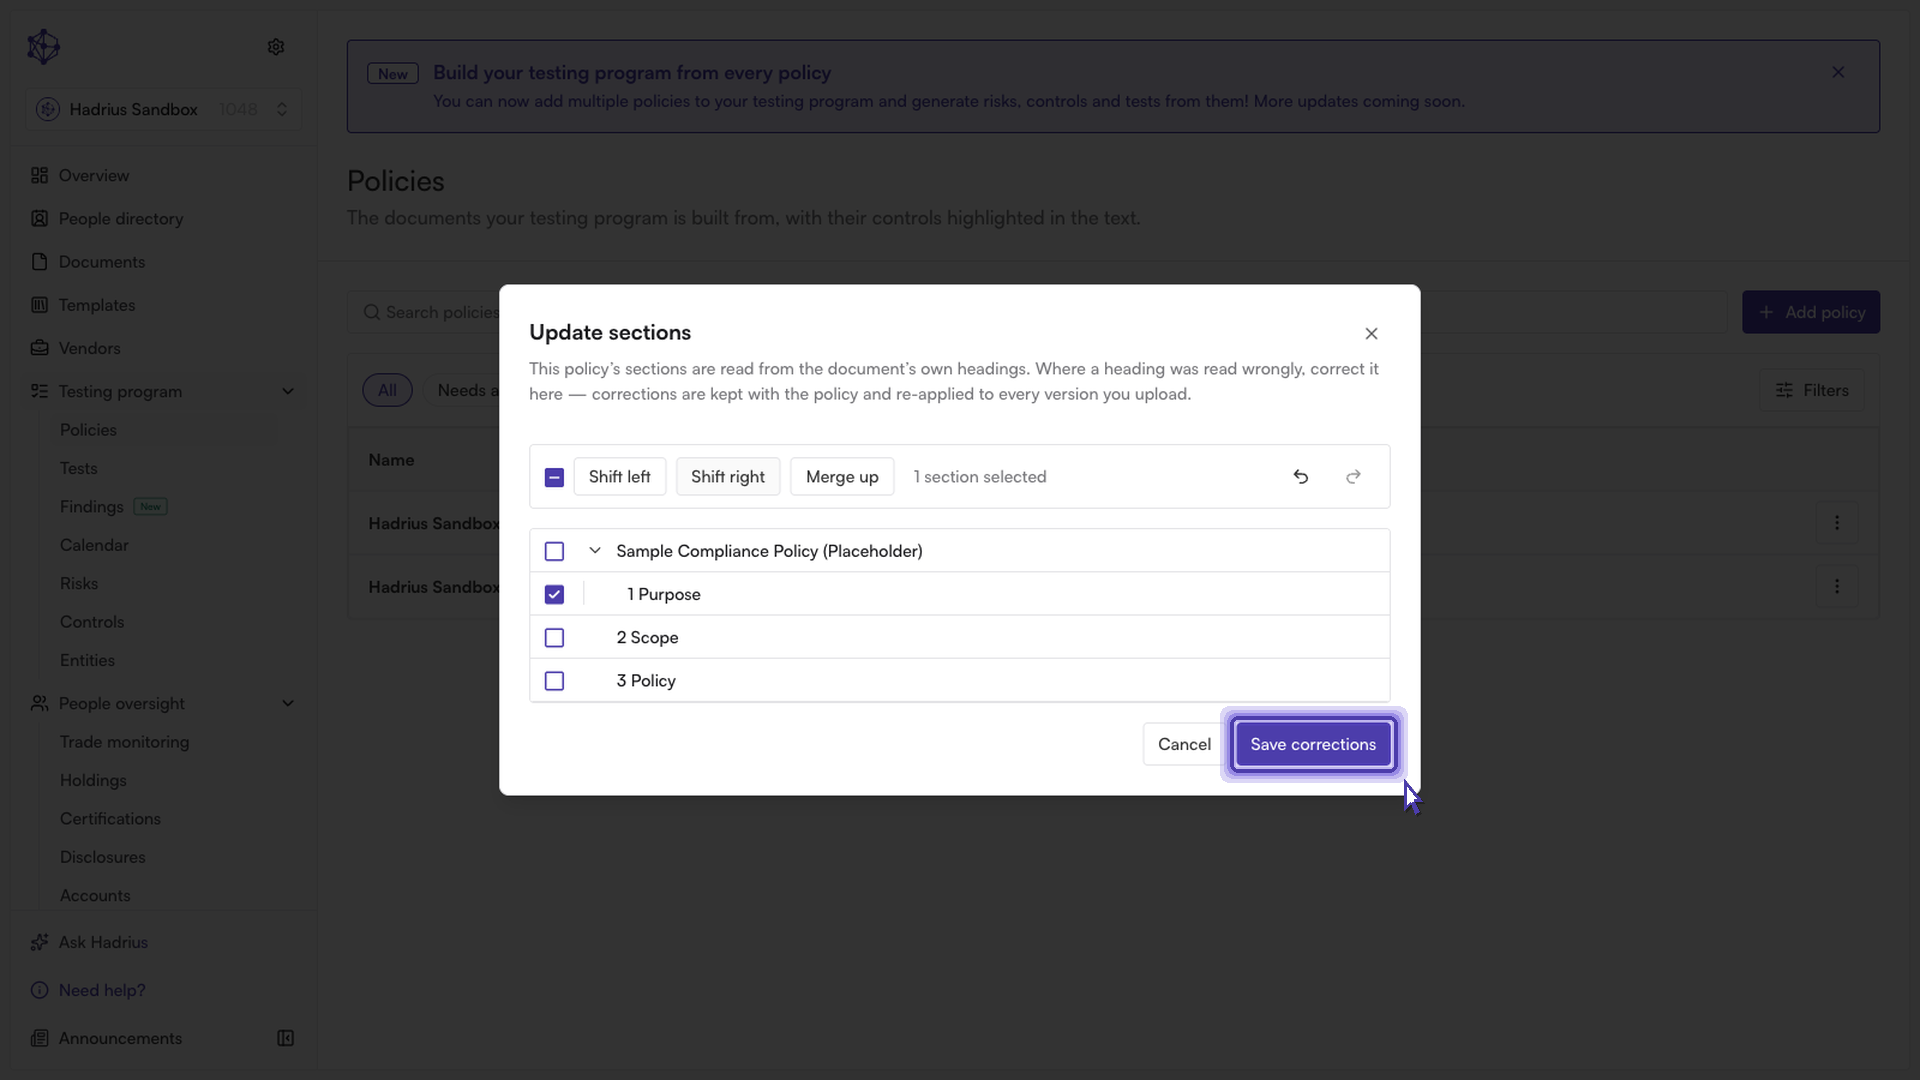
Select "Update sections" from the menu. This opens a dialog showing every section of the policy as a flat, indented list — each row represents one heading as it was read from the document.
Selecting the sections to fix
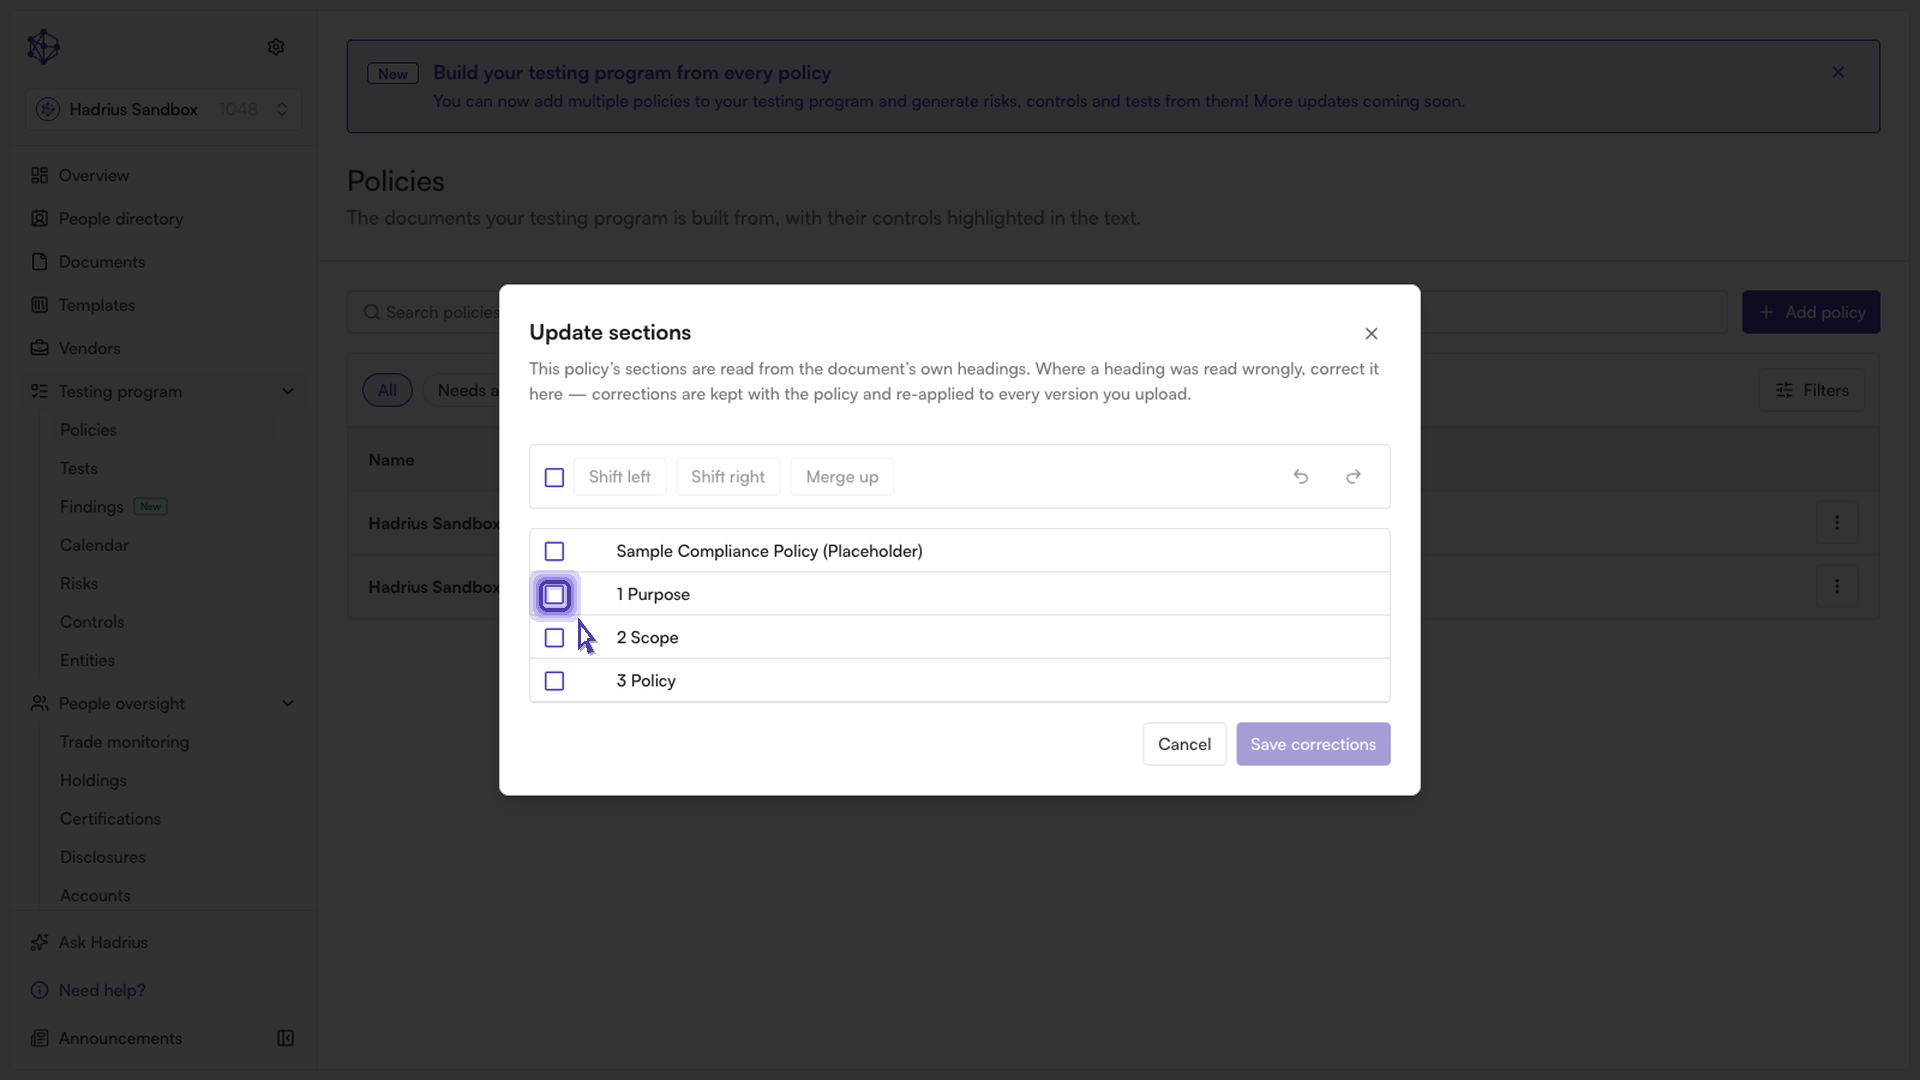
Click the checkbox next to a section to select it. To select a run of consecutive sections at once, check one row and then shift-click another — everything between them is selected, and the toolbar buttons at the top of the dialog will act on the whole selection.
Correcting the structure
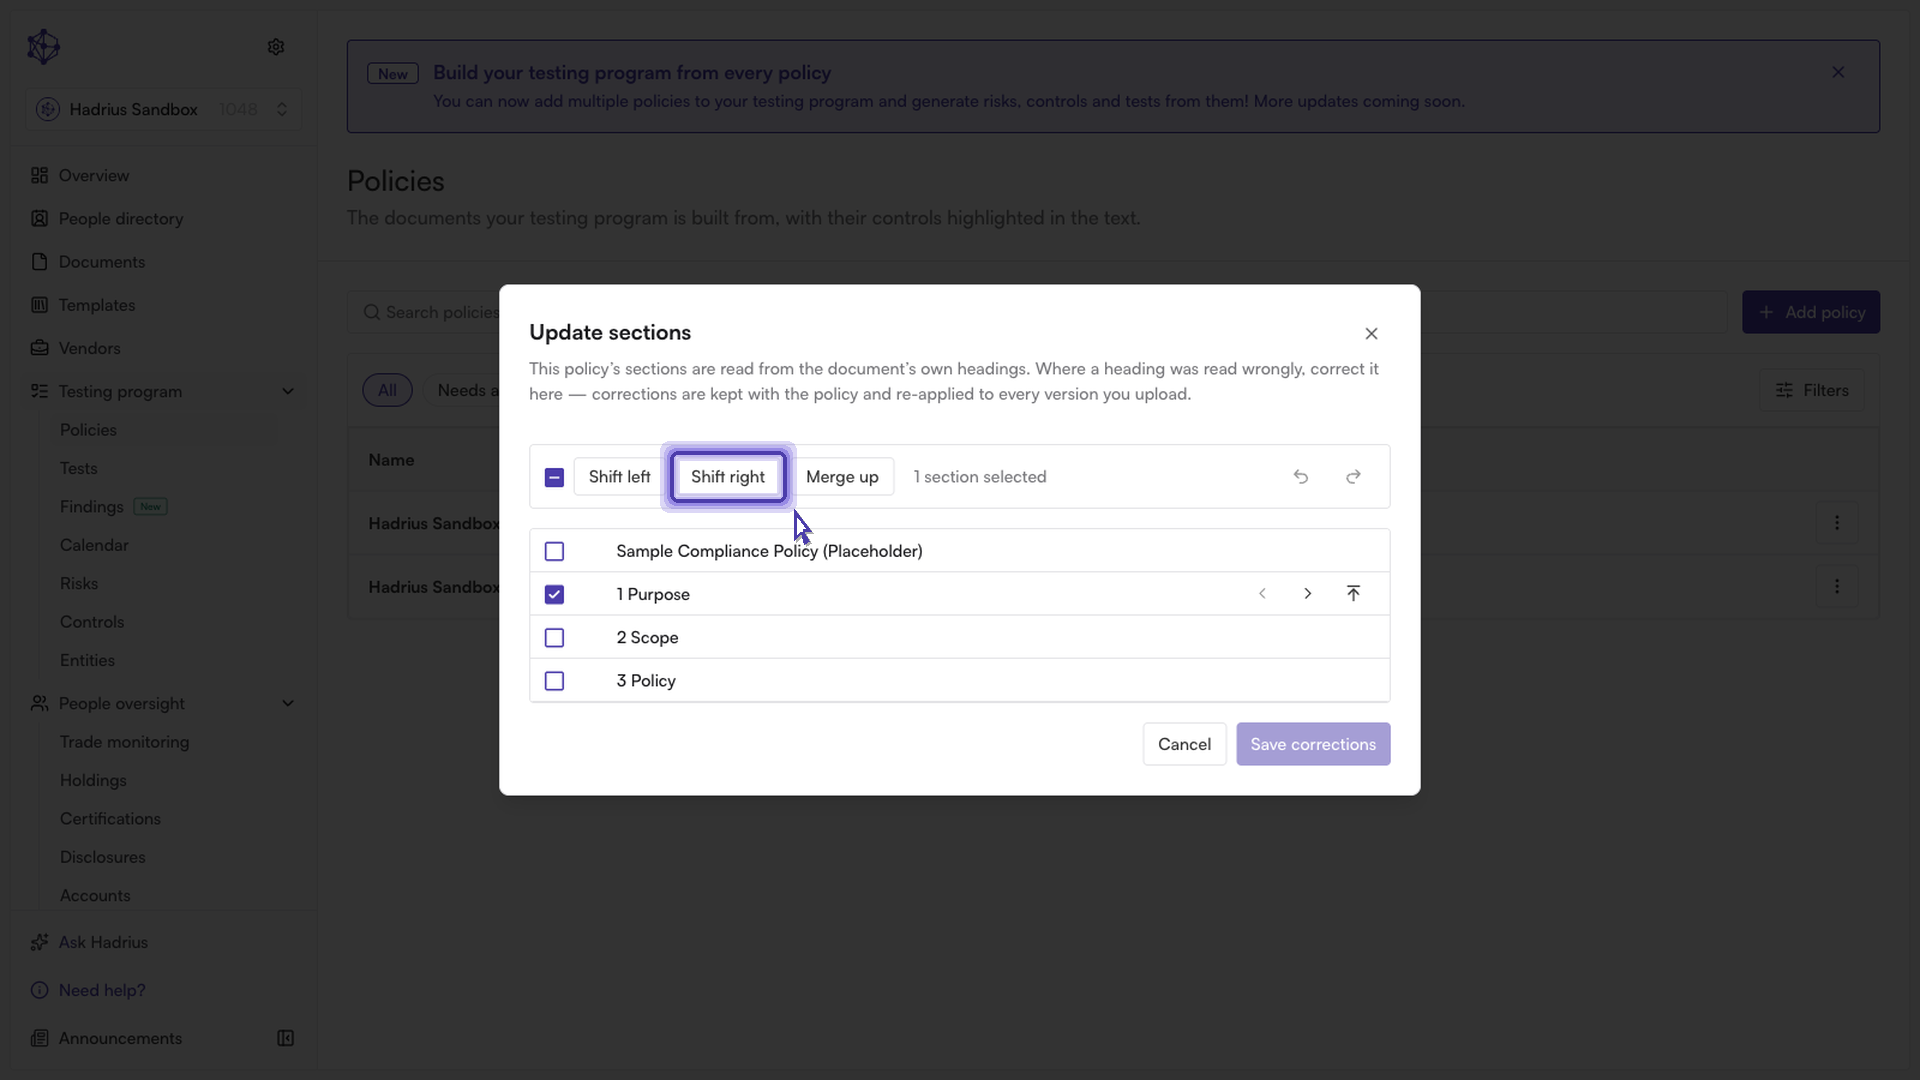
With one or more sections selected, use the toolbar (or the controls that appear when you hover a single row) to correct how it reads:
Shift right nests the selected section(s) one level deeper, under the section immediately above — use this when a sub-section was read as if it were a top-level heading.
Shift left promotes the selected section(s) up one level, for a heading that was read as too deeply nested.
Merge up folds a section into the one above it — useful for a stray table-of-contents row or running header that shouldn't be its own section at all.
You can expand or collapse any section with children to focus on the part of the tree you're working on, and if a correction doesn't look right, "Undo" and "Redo" step through your recent changes without losing the rest of your work.
Saving your corrections
Once the structure matches how the document actually reads, click "Save corrections." Only the changes you made are sent — the rest of the tree is left as-is — so this is a fast, targeted update rather than a full re-parse of the document.
What happens next
Your corrections are saved with the policy and applied automatically to future versions you upload, so you shouldn't need to repeat the same fix each time the document is updated. Any controls linked to a section move along with it, and you'll see a confirmation noting how many corrections — and any relinked controls — were saved.