How to Upload Vendors to Hadrius
Last updated: October 17, 2026
Use this workflow any time your organization begins a new relationship with a third party and needs to bring them into Hadrius for tracking and ongoing risk oversight. Adding a vendor creates its record in the vendor directory and opens the profile where you'll capture its risk level, classification, and point of contact — the information Hadrius uses to manage due diligence going forward.
Start from the vendor directory
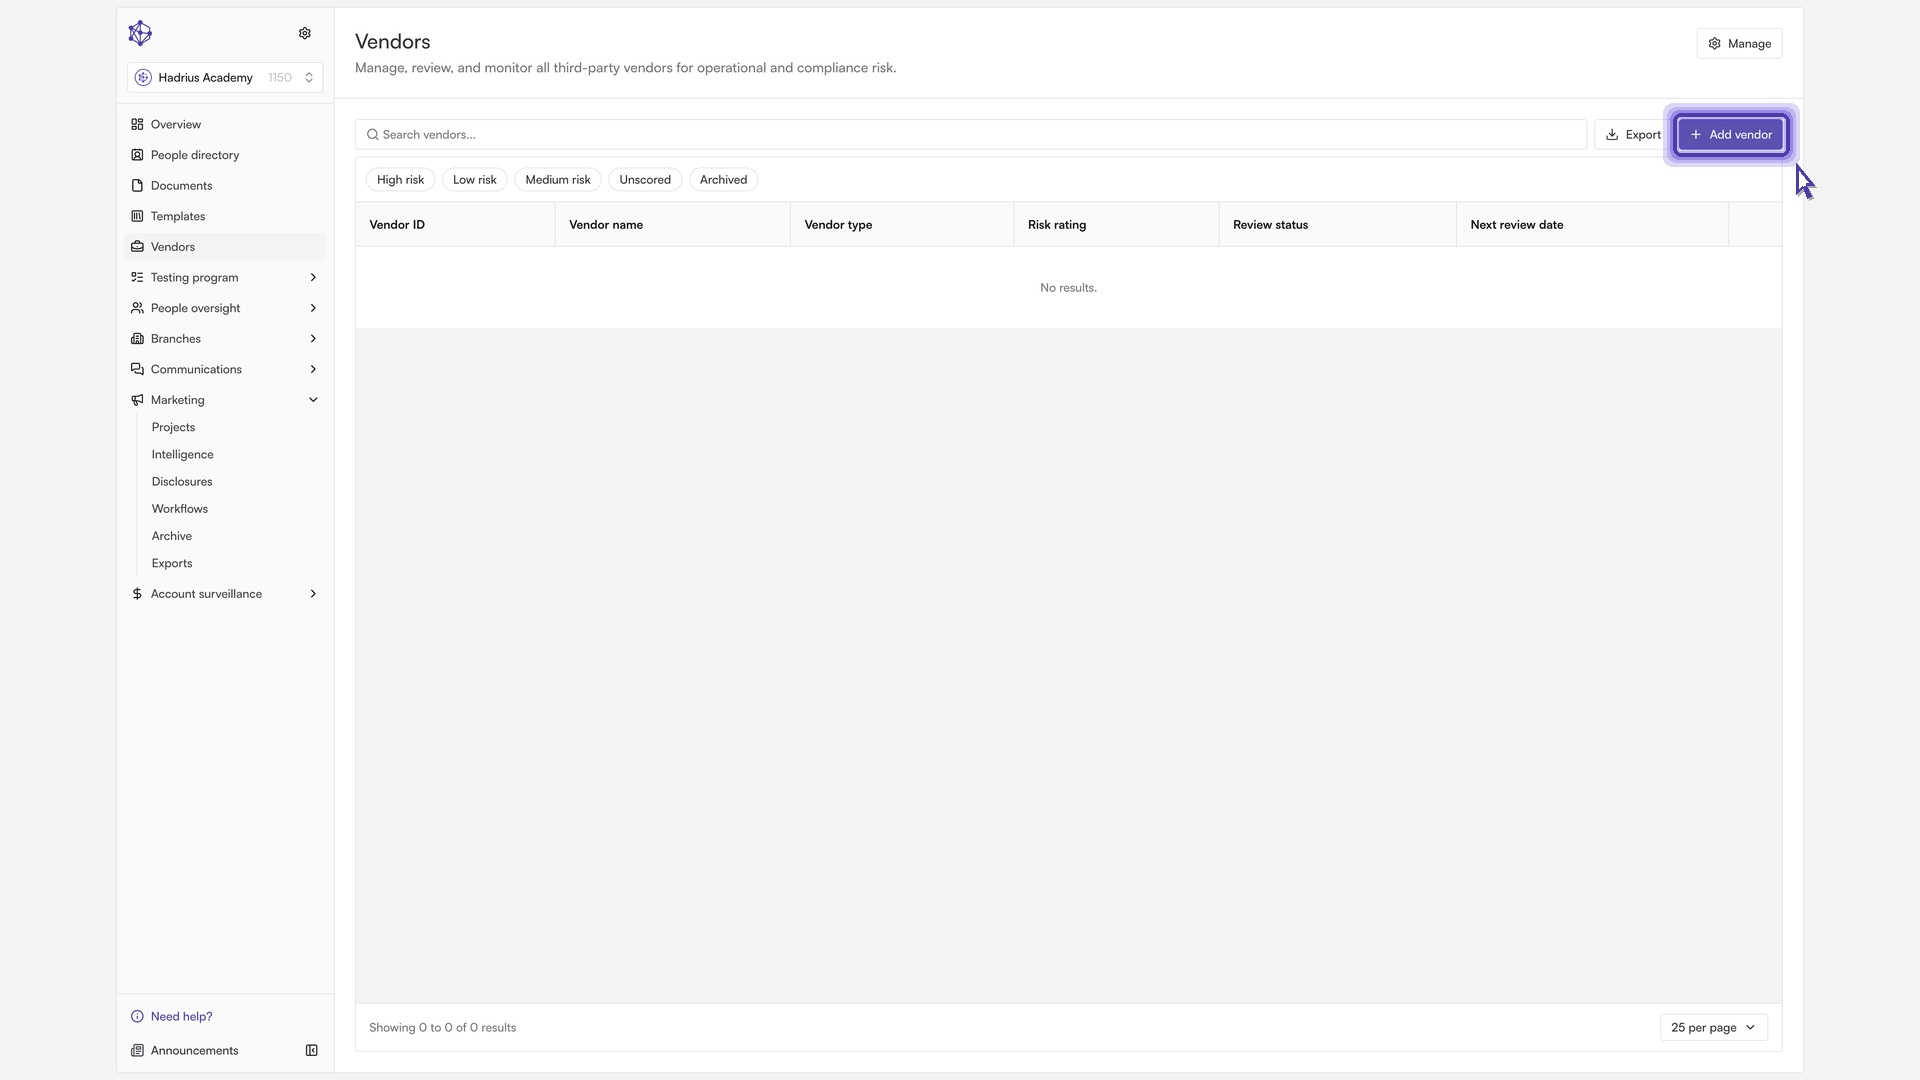
Open the vendor directory, where every third-party relationship your organization tracks already lives. Click Add vendor to begin onboarding a new one.
Enter the basics
A dialog prompts you for the vendor's name and website. The name is required; adding the website is optional but worthwhile, since it lets Hadrius automatically look up details about the vendor once the record is created. Click Add vendor to create the record and open its full profile.
Let AI fill in the profile (optional)
If you provided a website, Hadrius is already working in the background: it scans the vendor's site and drafts a description for you, which appears on the profile a few moments after the record is created.
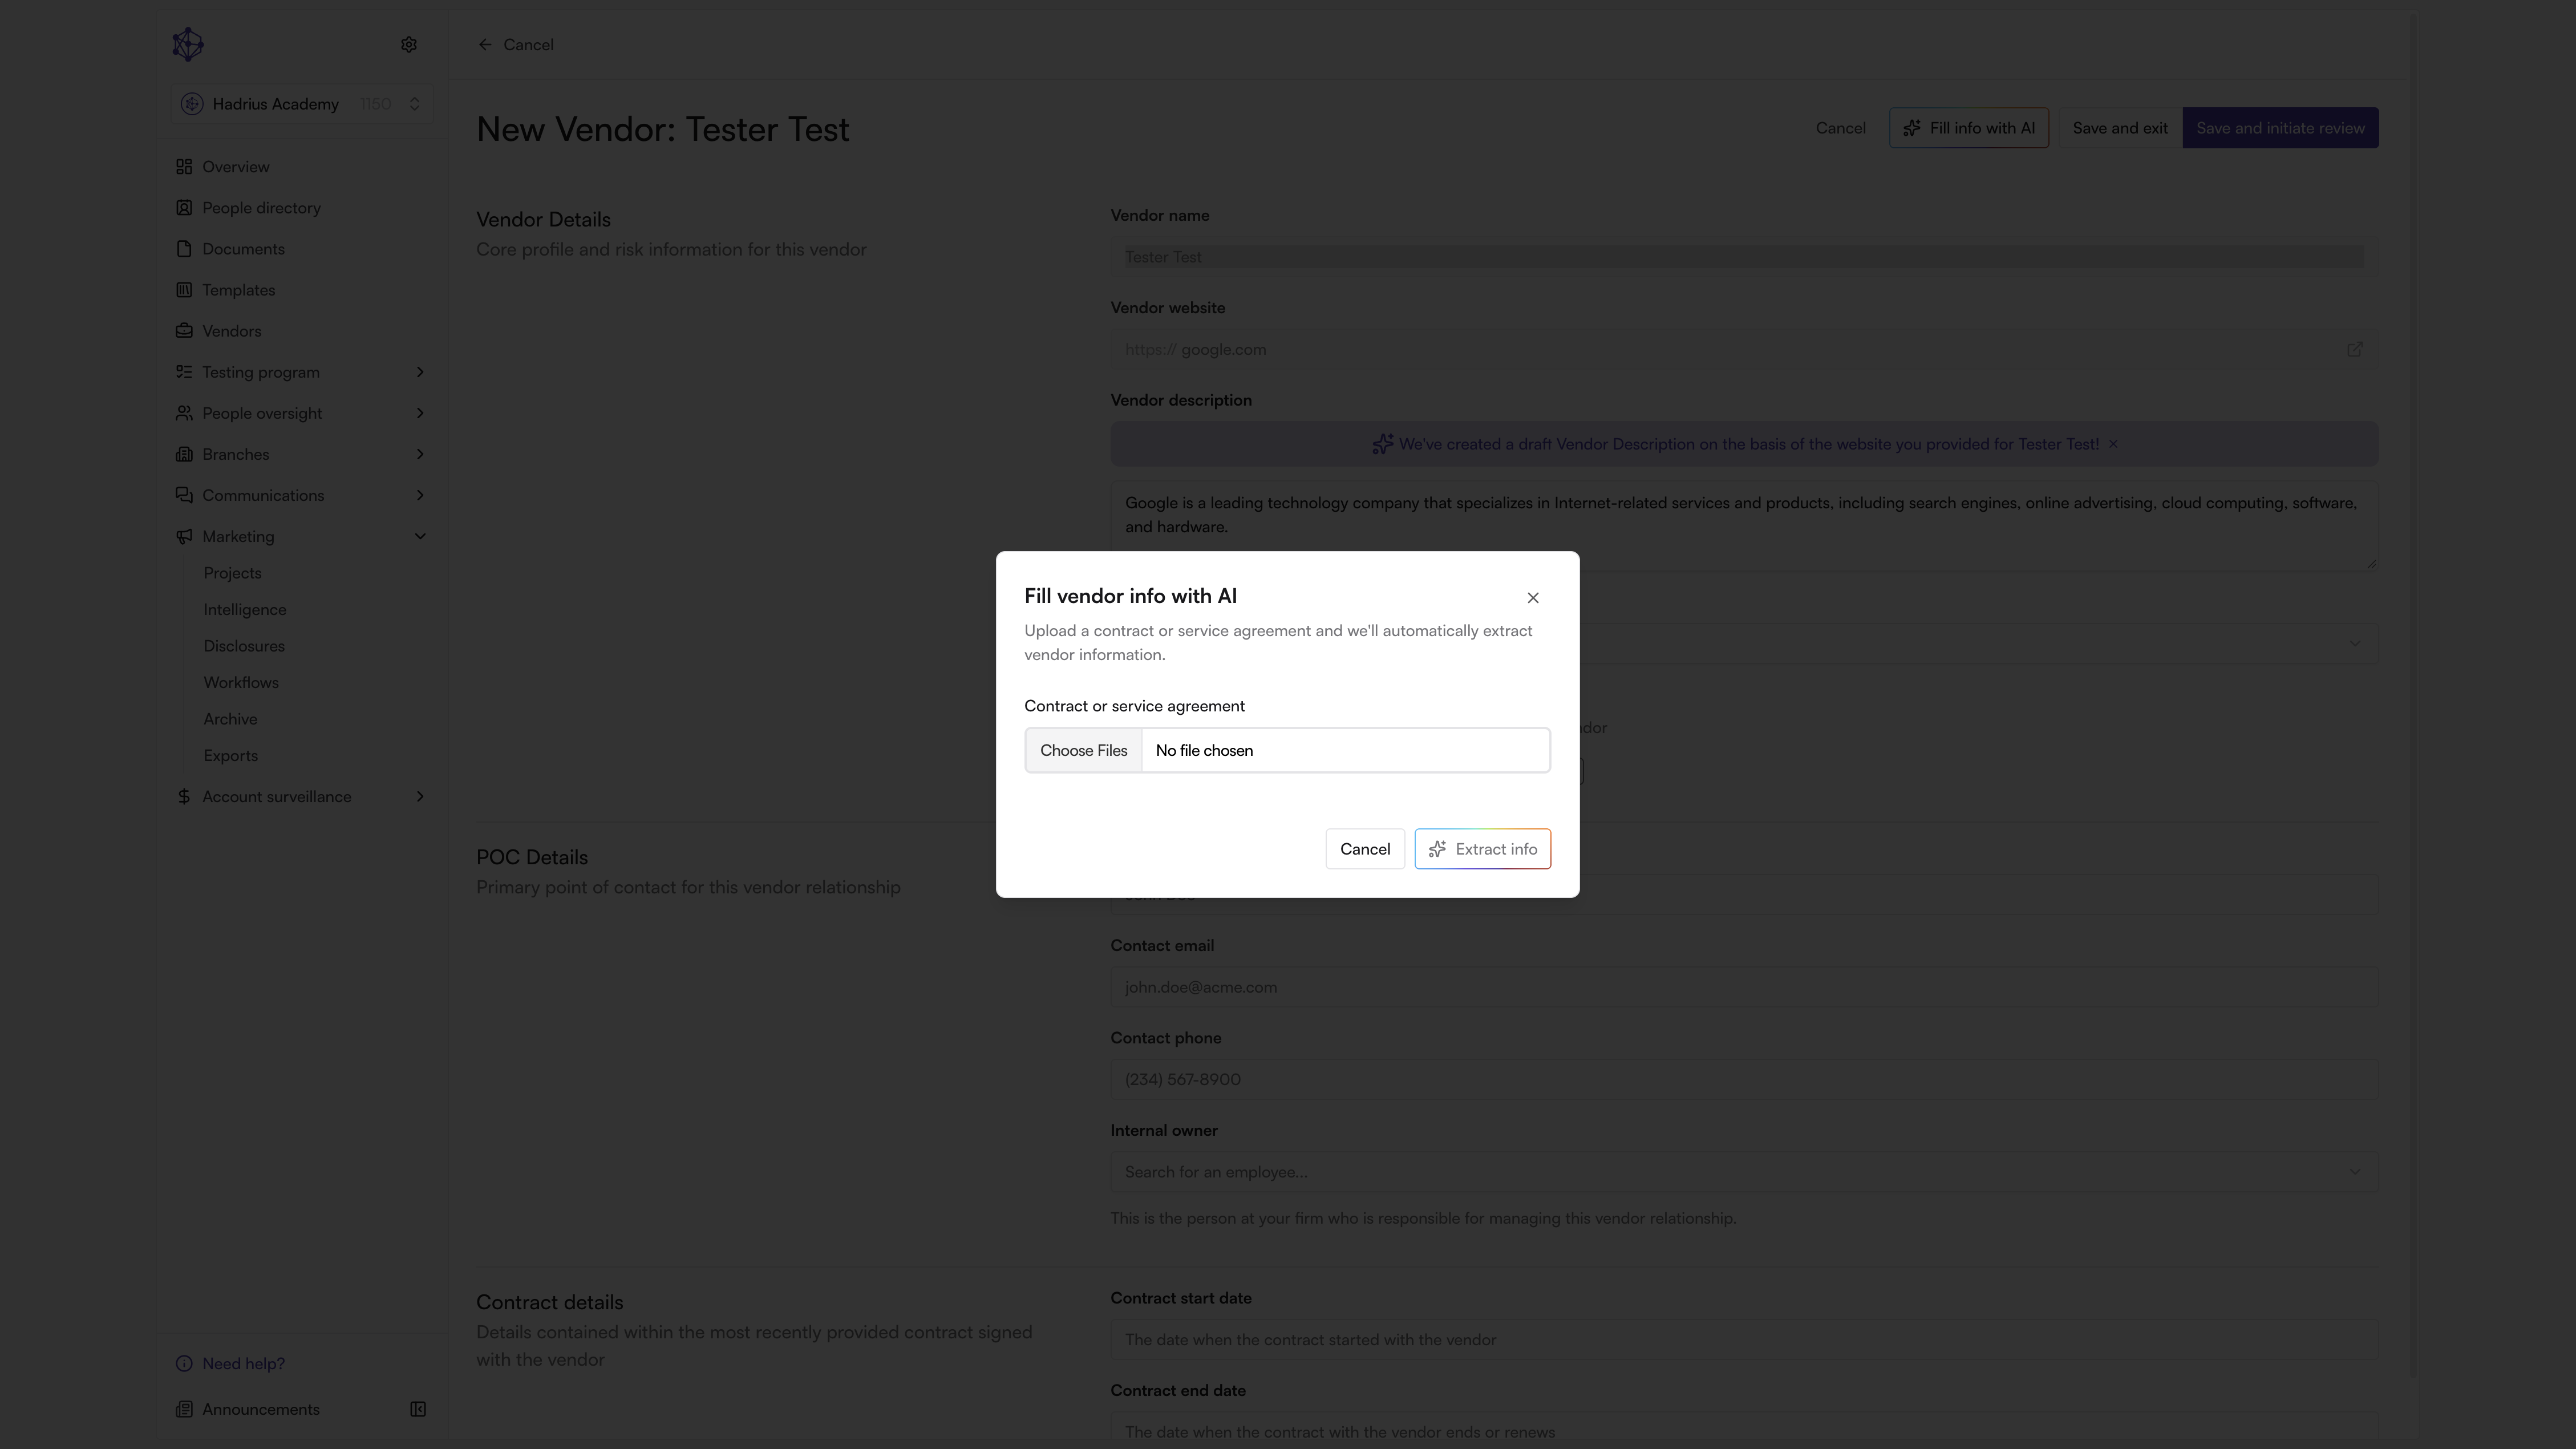
For a faster — and more accurate — alternative, click Fill info with AI near the top of the profile. This lets you upload a vendor agreement or service contract (PDF, Word, or text file) instead of filling in details by hand. Hadrius reads the document and populates fields such as the description, vendor type, and point-of-contact details automatically, so you can simply review and adjust rather than typing everything from scratch.
Complete the vendor profile
With the basics in place, fill out the vendor's core profile and risk details:
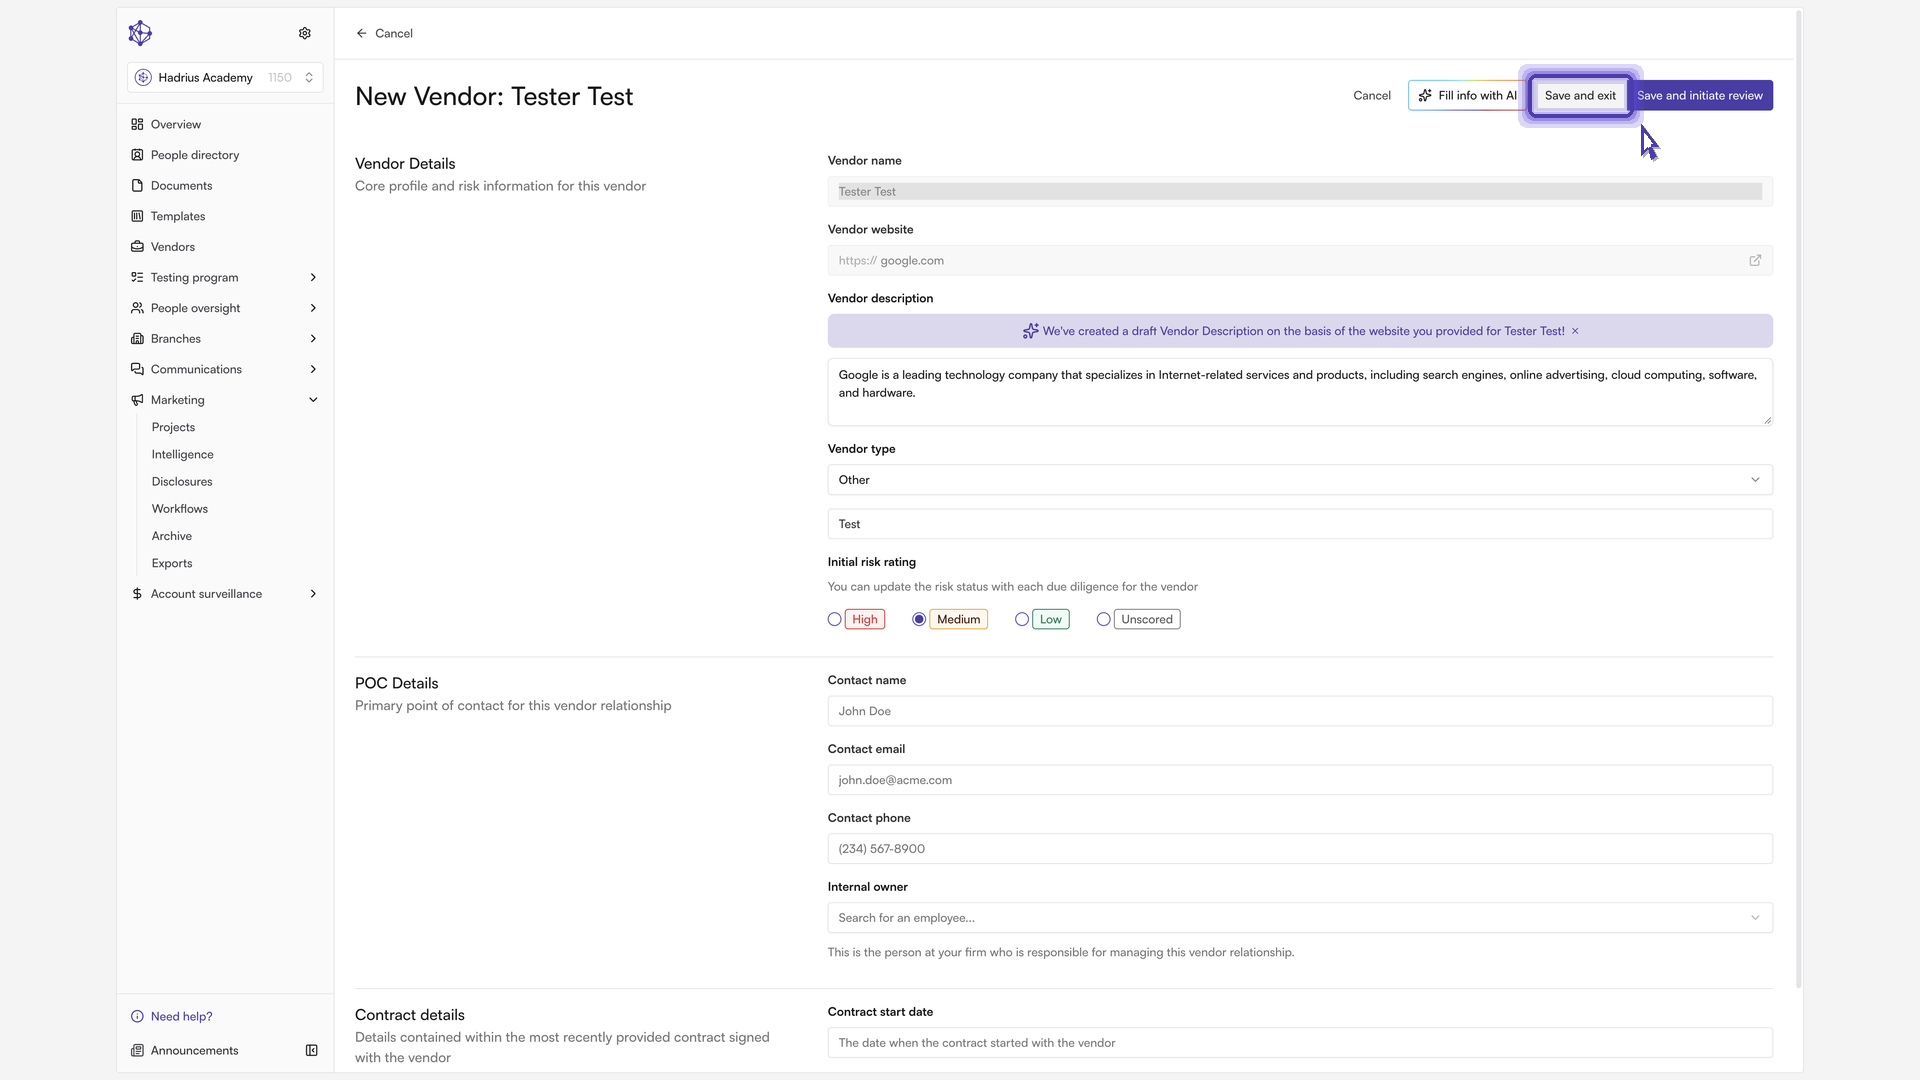
Vendor description — refine the auto-generated text or write your own summary of what the vendor provides.
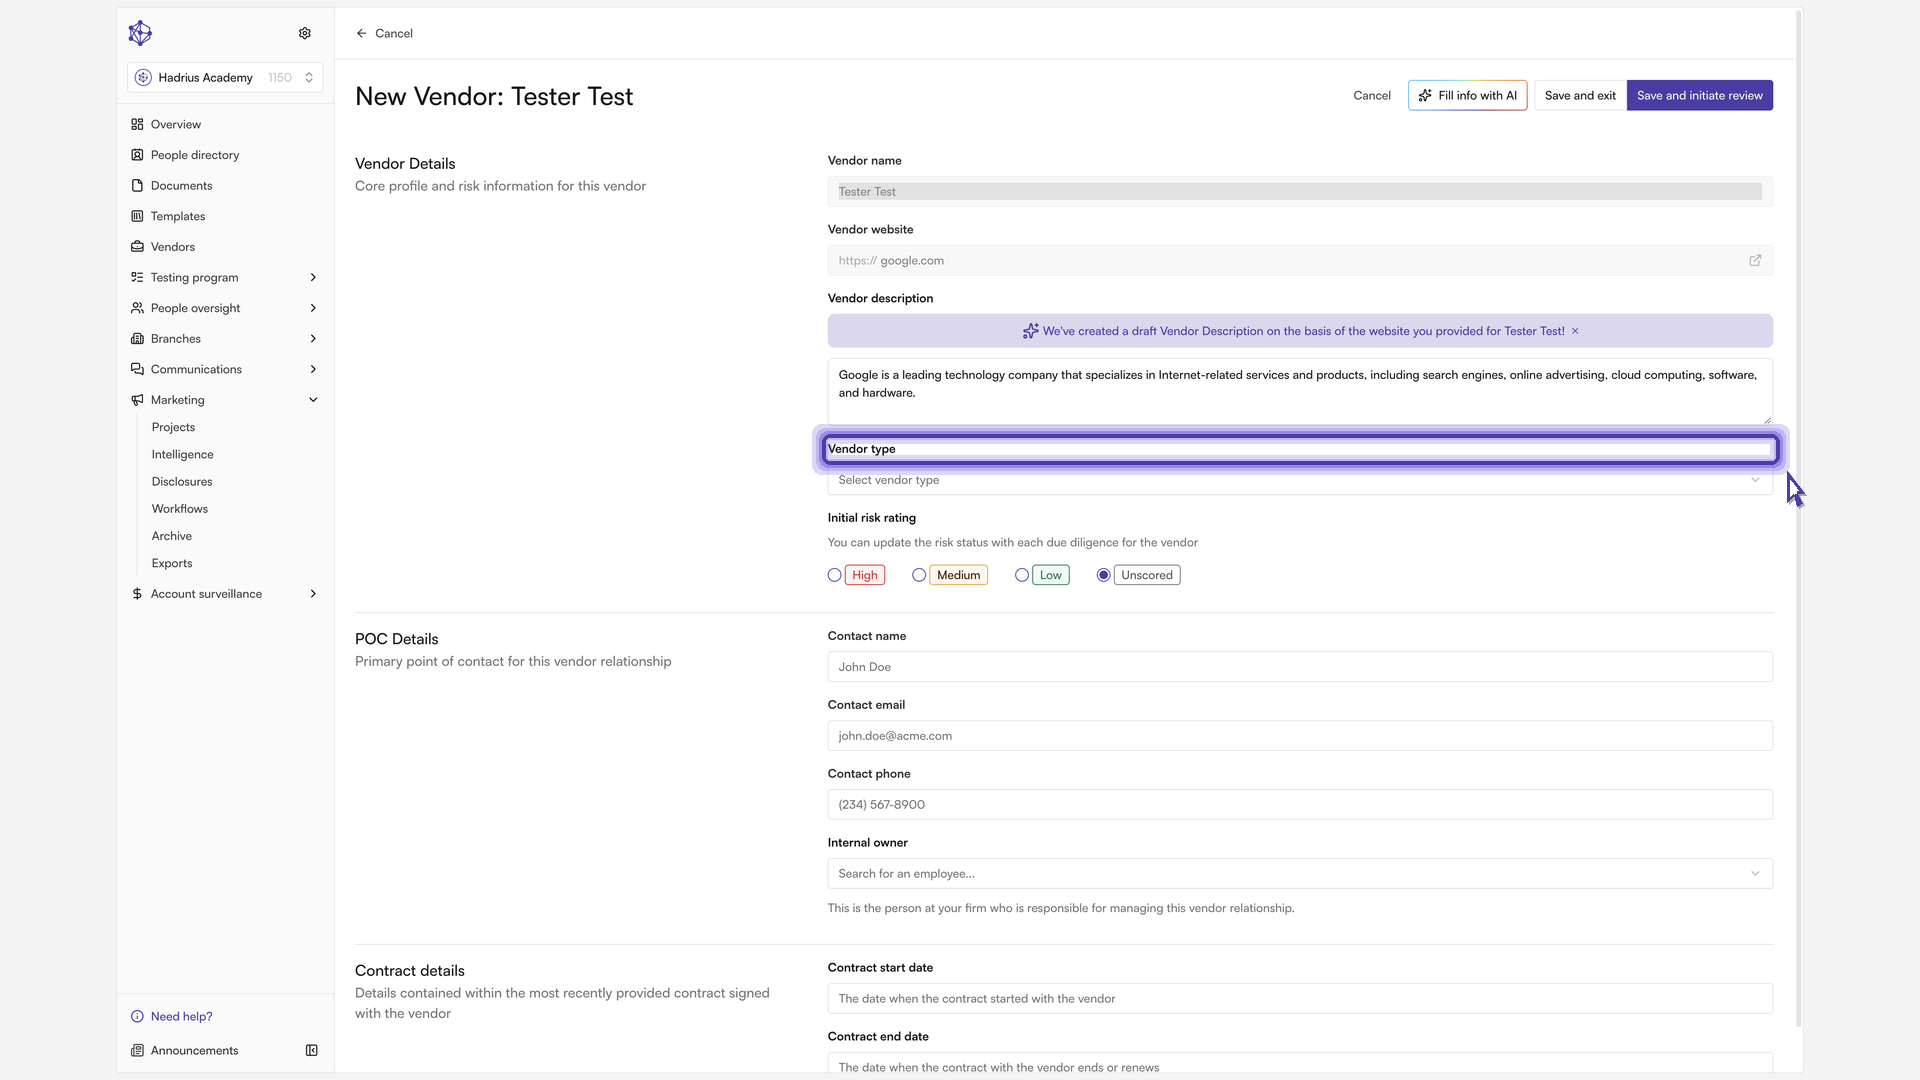
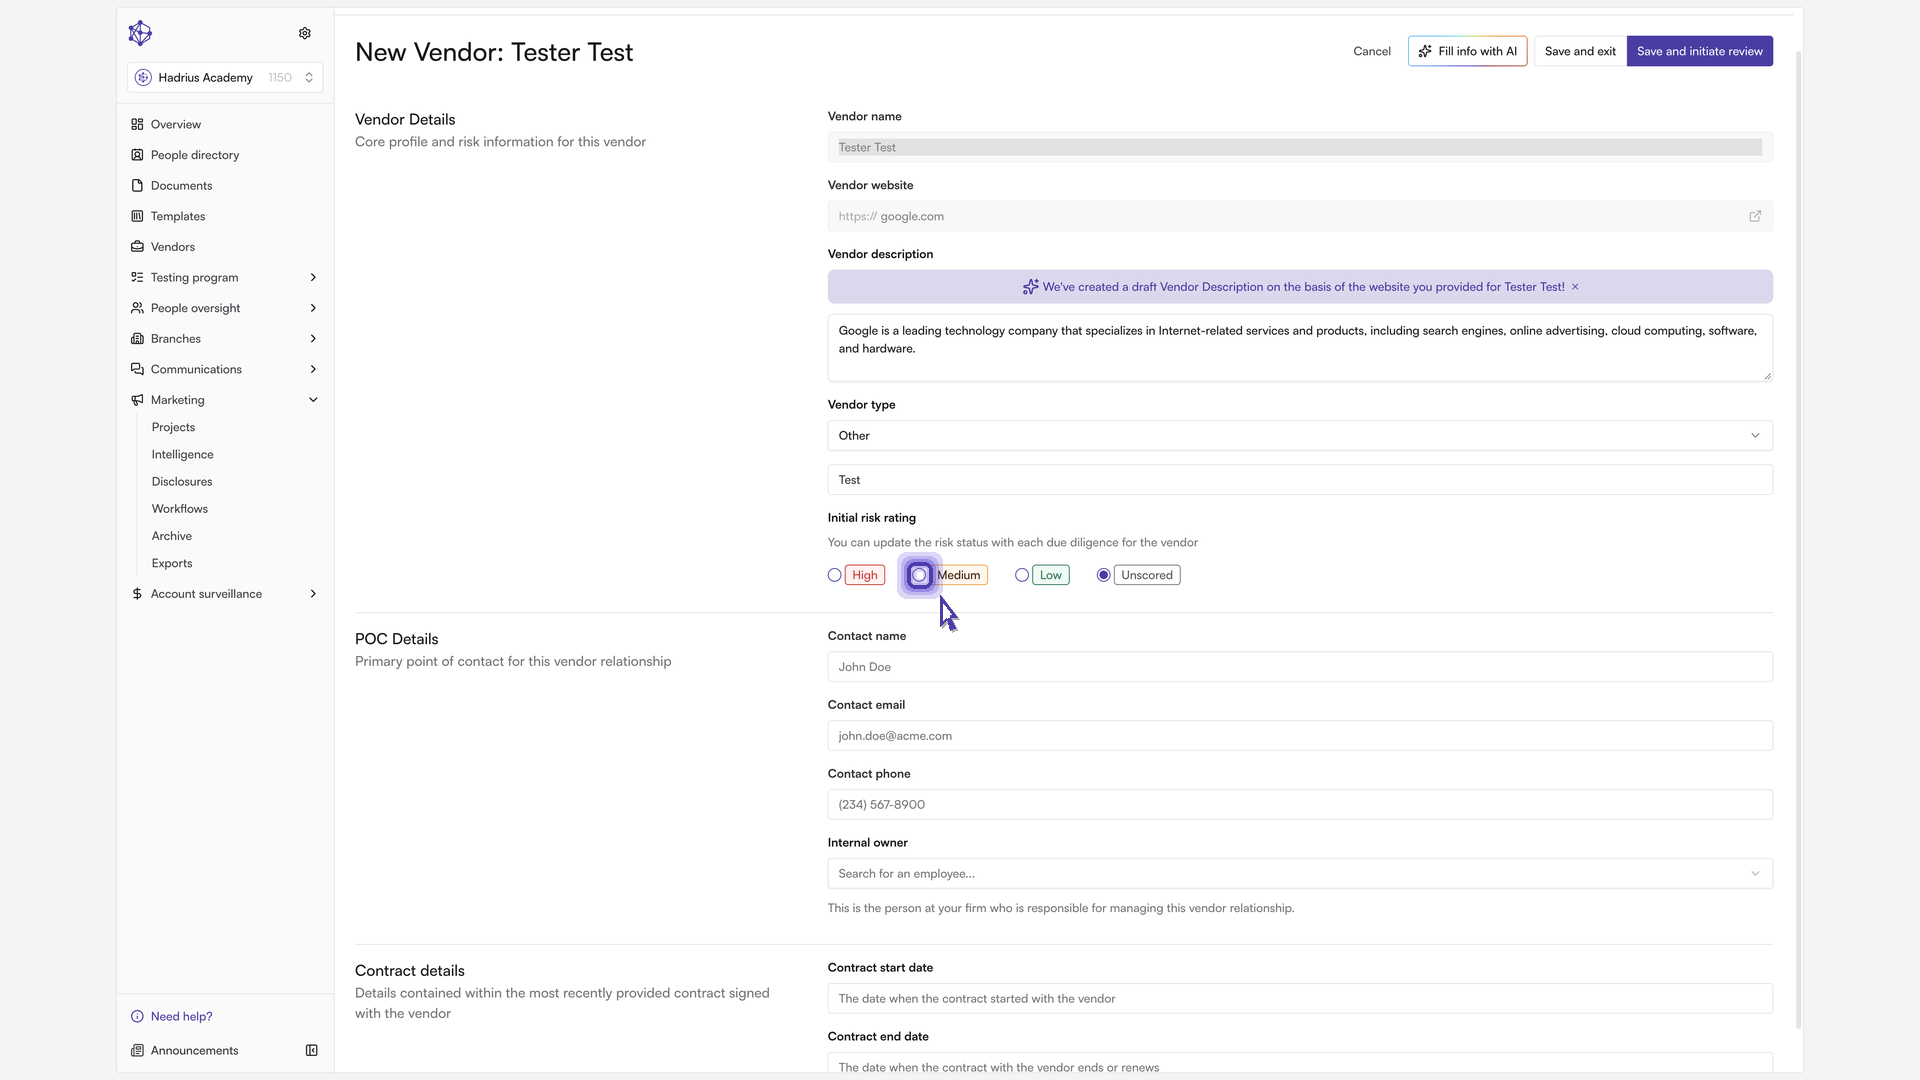
Vendor type — classify the relationship (for example, Fintech Vendor, Custodian, or Sub Advisor). If none of the standard categories fit, select Other and a text field appears so you can spell out the custom vendor type.
Initial risk rating — set the vendor to High, Medium, Low, or leave it Unscored. This rating drives how the vendor is prioritized and surfaced across your risk dashboard, and can be updated later as reviews are completed.
Add a point of contact
In the point-of-contact section, add the vendor's main contact name, email, and phone number so communication stays centralized. You can also assign an internal owner — the employee at your firm responsible for managing this vendor relationship.
Save the record
When everything looks correct, click Save and exit. This locks in the vendor record and returns you to the vendor directory, where the new vendor now appears alongside the rest of your third-party relationships.
From here, the vendor is ready for ongoing oversight — you can open its record at any time to update risk details, attach documentation, or initiate a formal review.