How to Configure Trade Monitoring Rule
Last updated: September 30, 2026
Trade monitoring flags employee trades that meet conditions your firm defines. Those conditions live in the flagging rules, and the automation that acts on the resulting pre-trade disclosures lives alongside them. This article covers both halves: creating a rule for a single symbol pattern, creating a rule backed by an uploaded security list, and configuring auto-approval and auto-rejection. Work through it when you are setting up trade monitoring for the first time, or whenever a new restriction needs to be added.
Before you start
You will need admin access to trade monitoring. If you plan to restrict a large set of securities, have the list ready as a CSV or XLSX file — the importer accepts only those two formats.
Opening the flagging rules
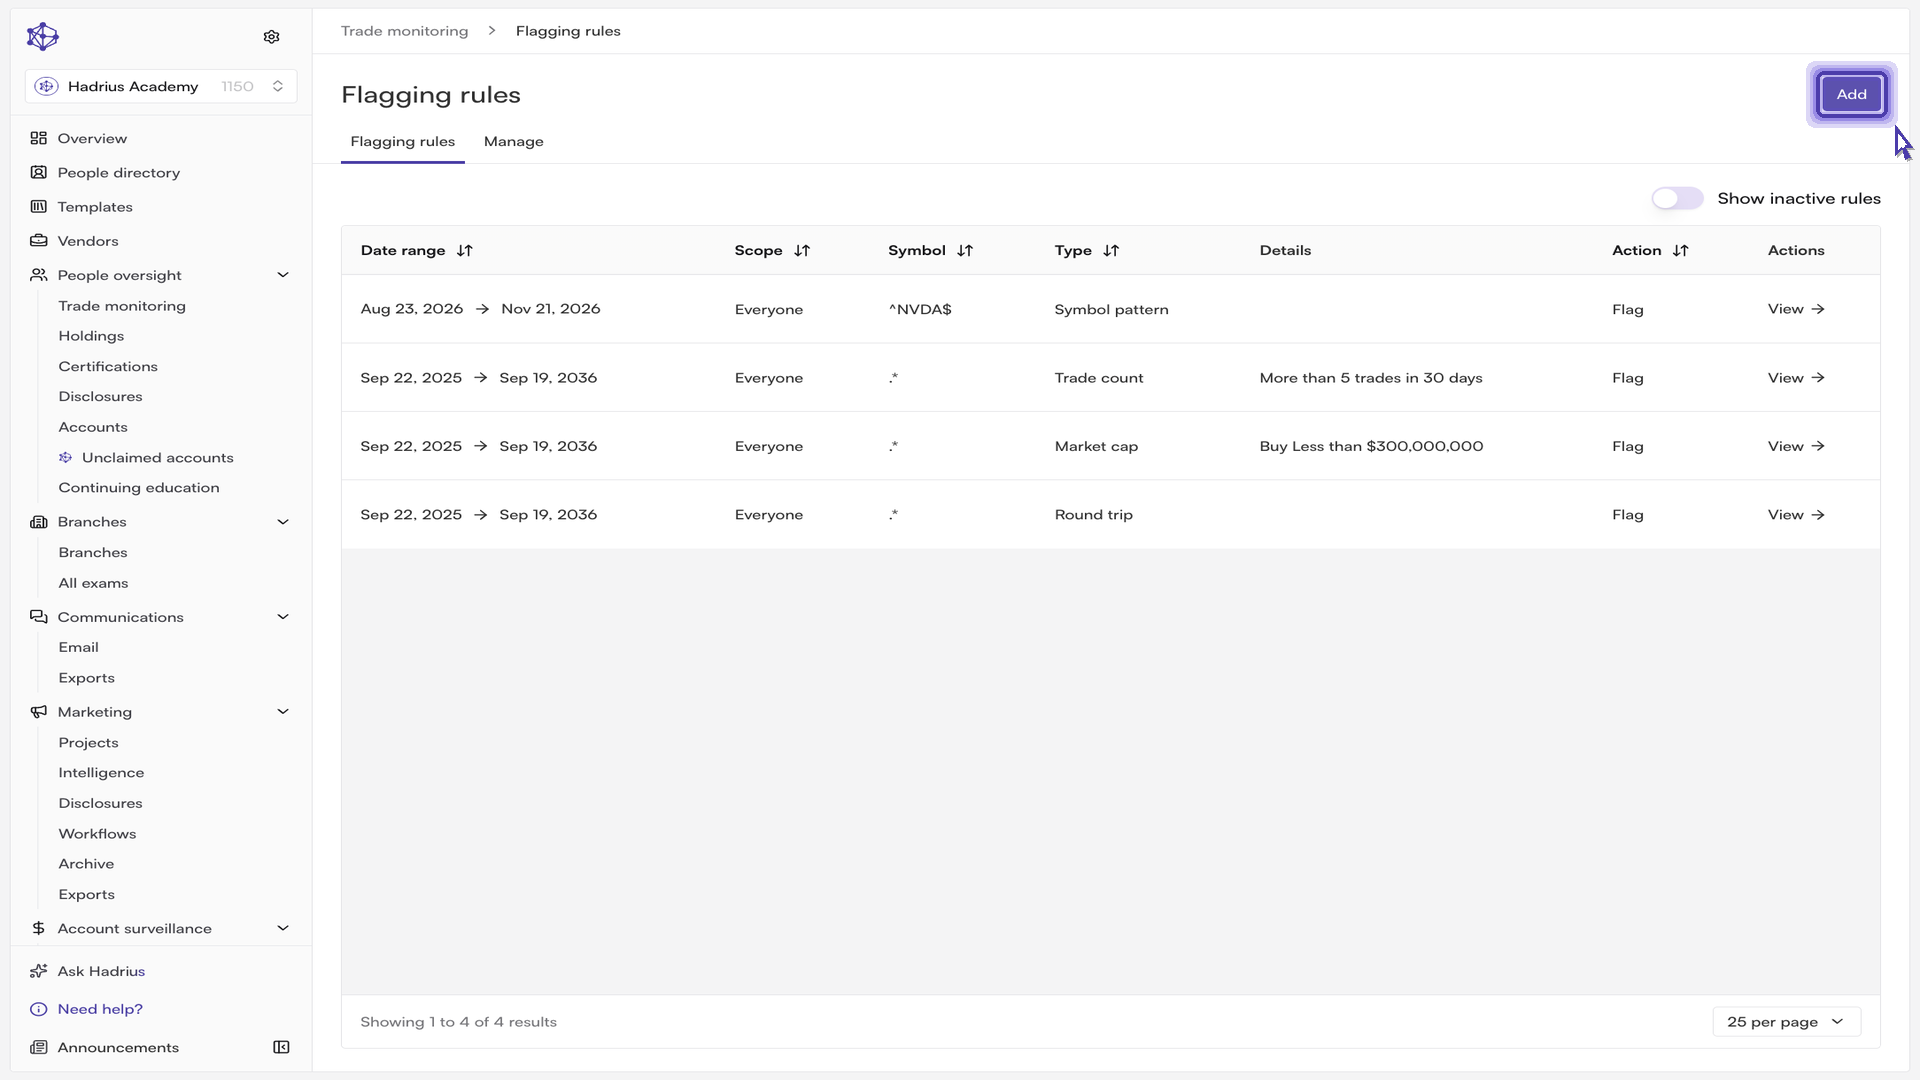
Start from the trade monitoring dashboard, where flagged employee trades arrive for review. Every flag there traces back to a rule, so open the "Flagging rules" tab to see what is driving them. The rules table lists each rule's date range, scope, symbol, type, details, and action — "Flag" or "Whitelist" — and by default shows only rules that are currently active. Use the "Show inactive rules" toggle to review rules that have ended or been switched off.
Creating a symbol pattern rule
To build a restriction from scratch, open the add-rule page and start with "Choose a rule type". The rule type determines which fields appear below it — the options cover symbol patterns, security lists, cost basis, trade count, industry, asset class, market cap, percent change, and round-trip (day trading). Choose "Symbol pattern" for a restriction on one ticker or a family of related tickers.
Under "Rule conditions", enter the symbol and set the effective dates. The start date tells the platform when the restriction begins applying to trades; leave the "Indefinite" switch on if the rule should not expire, or turn it off to set an end date. Wildcards are useful in the symbol field: a symbol root followed by an asterisk matches every symbol that begins with that root, which catches related tickers without adding each one separately.
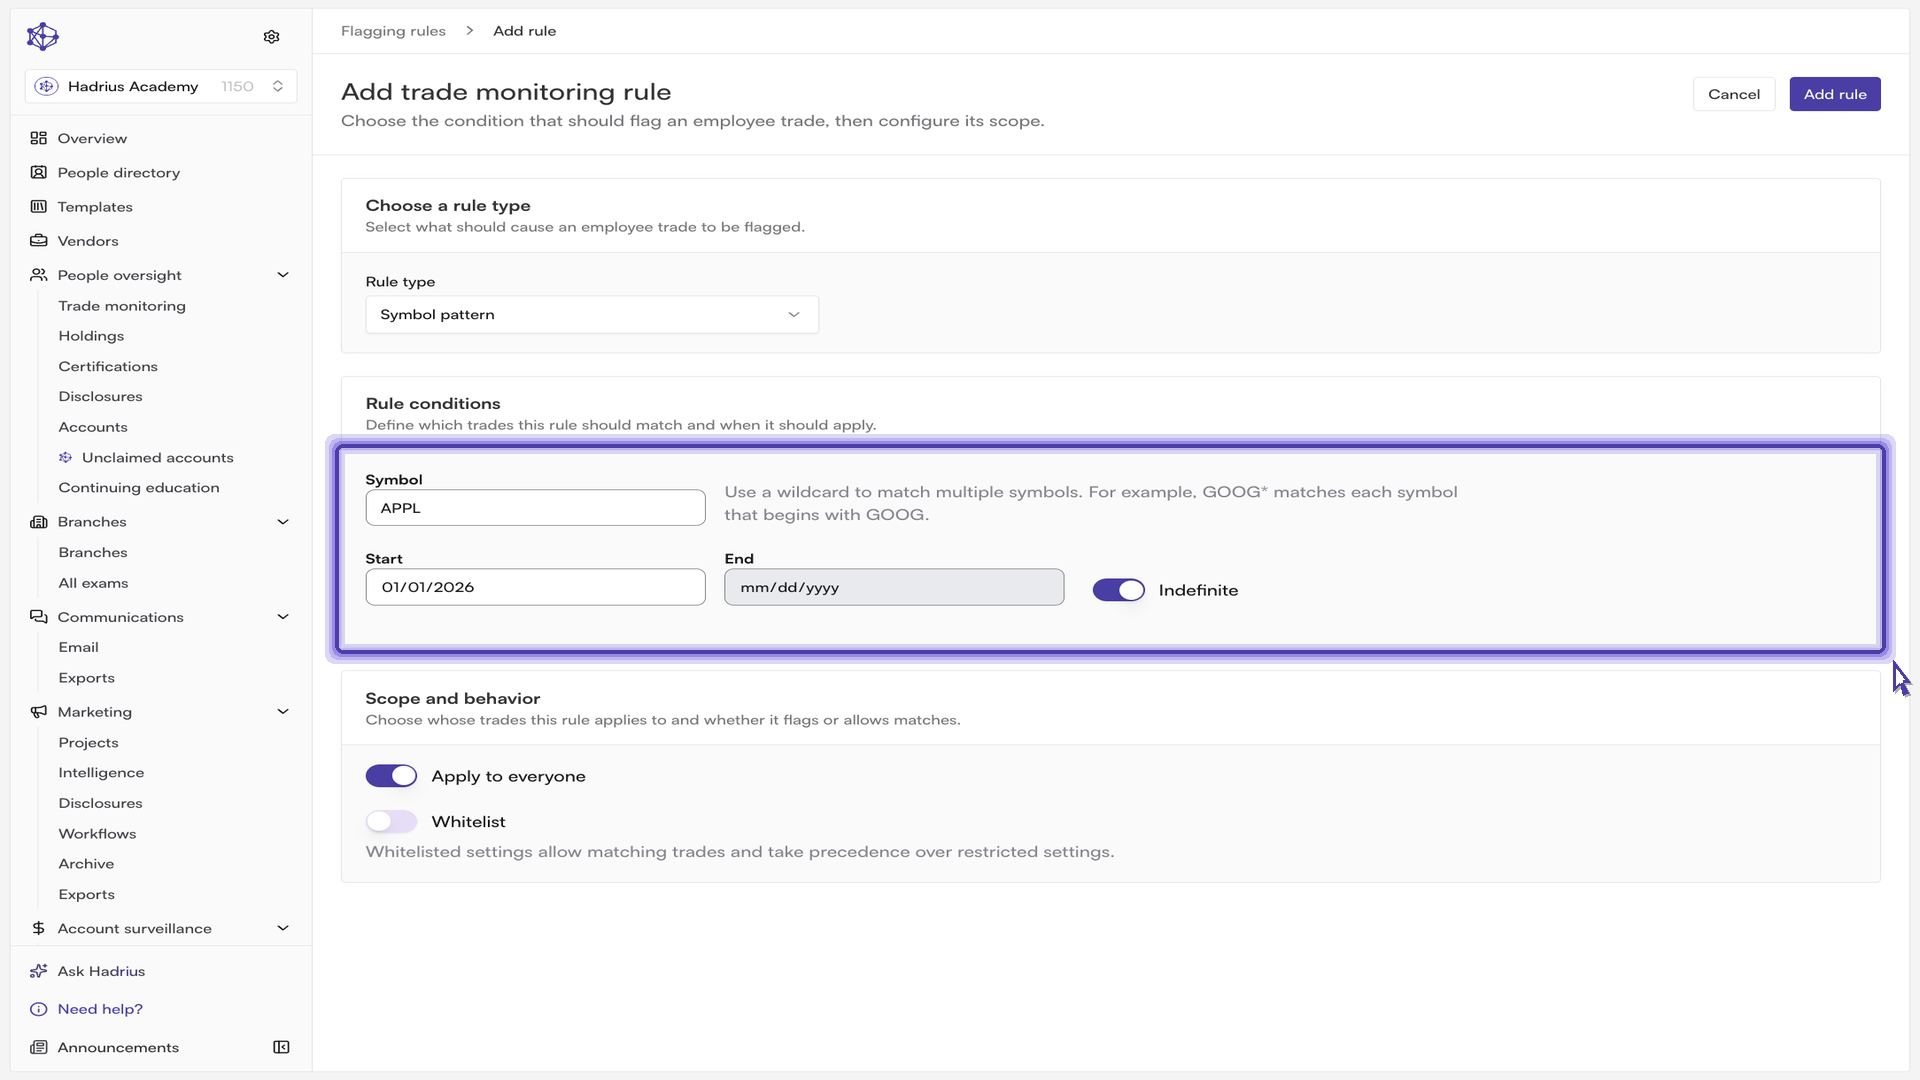
Finally, set "Scope and behavior". Leave "Apply to everyone" on for a firm-wide restriction, or turn it off and select the specific employees it should cover. The "Whitelist" switch inverts the rule — whitelisted rules allow matching trades and take precedence over restricting rules — so leave it off for a normal restriction. Select "Add rule" and the rule joins the active rule set immediately.
Creating a security list rule
Single symbols work well for a handful of restrictions, but a larger restricted universe is better handled as one rule backed by a file. Choose "Security list" as the rule type and the page switches to the upload flow, letting you restrict hundreds of securities under a single rule.
Give the rule a clear name first. The name is what reviewers see later when they are trying to understand why a trade was flagged, so make it descriptive of the restriction's purpose. Then upload the file. The format guide under the uploader shows the exact columns the importer expects — symbol, CUSIP, ISIN, start date, and end date — and the "Download template" link gives you a correctly formatted starting file. One row per security, with a symbol, CUSIP, or ISIN; dates are optional, a blank start date means today and a blank end date means the entry applies until removed.
The platform validates the file as soon as you choose it, so bad rows never quietly enter the list. The review that appears shows how many rows are ready to apply and how many have issues, with the reason for each problem row. Only valid rows are applied; rows with issues are skipped. If the file needs correcting, use "Reupload" to swap in a fixed version. Nothing is saved until you select "Accept valid rows".
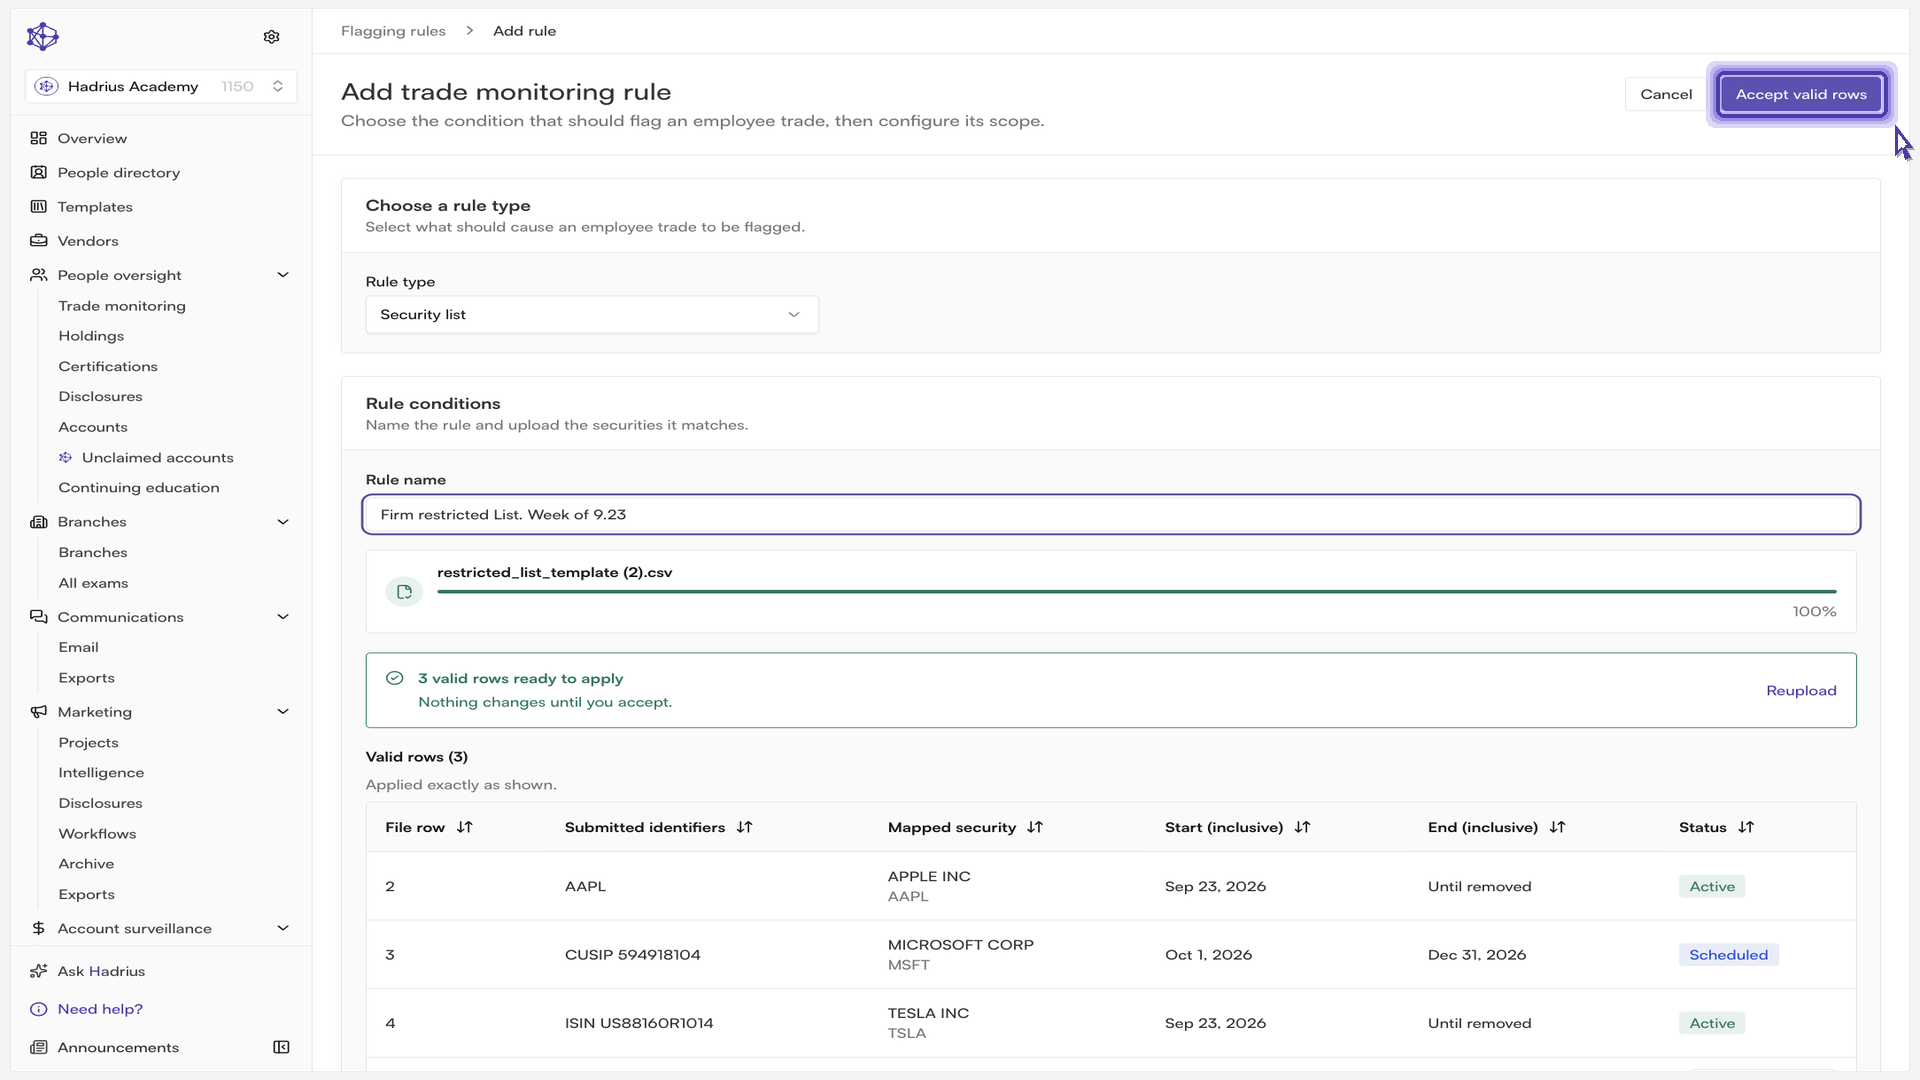
Set the audience and whitelist behavior in the same way as any other rule type before accepting. Once accepted, the rule opens on its own detail page. The summary at the top captures the full picture — the source of the list, whether the rule is enforced, who it applies to, its active period, and whether it flags or whitelists matches — with every submitted row listed underneath, filterable by active, scheduled, ended, and issue status. At the bottom of the page, the audit trail records the rule's full history, which is what keeps the restricted list exam-ready.
Return to the rules list and both restrictions now appear as active rules screening incoming trades.
Configuring pre-trade disclosure automation
Rules define what is restricted; the "Manage" tab controls what happens automatically when a pre-trade disclosure comes in. Three settings matter most here.
Cost basis buffer (+/- %) — gives disclosed trades a tolerance band around the cost basis threshold, so ordinary market movement between disclosure and execution does not produce a false flag. Enter a whole number between 0 and 99; the field cannot be left blank.
Auto-Approve — can be set to "Disabled", "Non-Restricted", or "Unconditionally". "Non-Restricted" is the safer configuration: disclosures that match no active restriction clear instantly, while anything that does match still goes to a reviewer. "Unconditionally" approves every disclosure regardless of restrictions.
Auto-reject restricted pre-trade disclosures — closes the loop on the other side. With this enabled, disclosures matching an active restriction are declined automatically instead of waiting in a reviewer's queue. Note that it cannot be combined with unconditional auto-approval; the platform will not accept both at once.
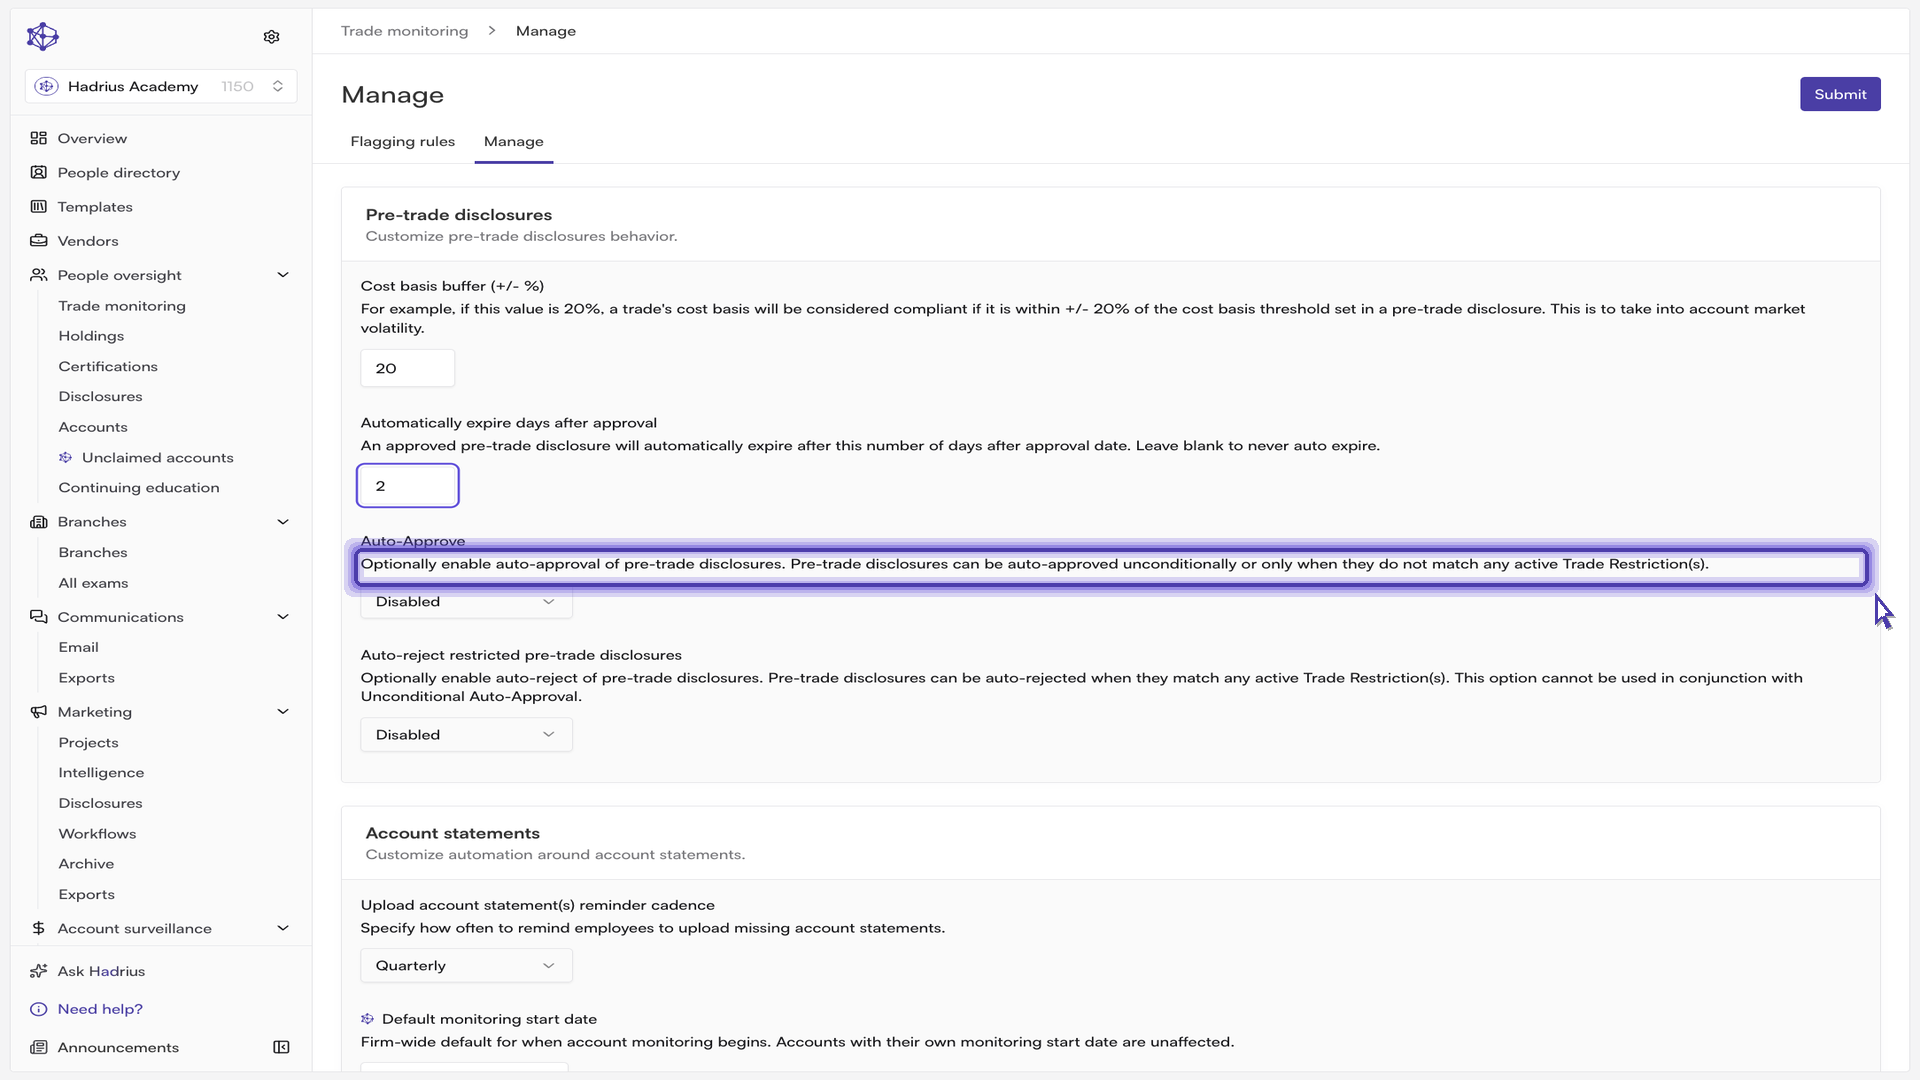
Select "Submit" to apply the configuration. It takes effect across every incoming pre-trade disclosure from that point forward.
Confirming the result
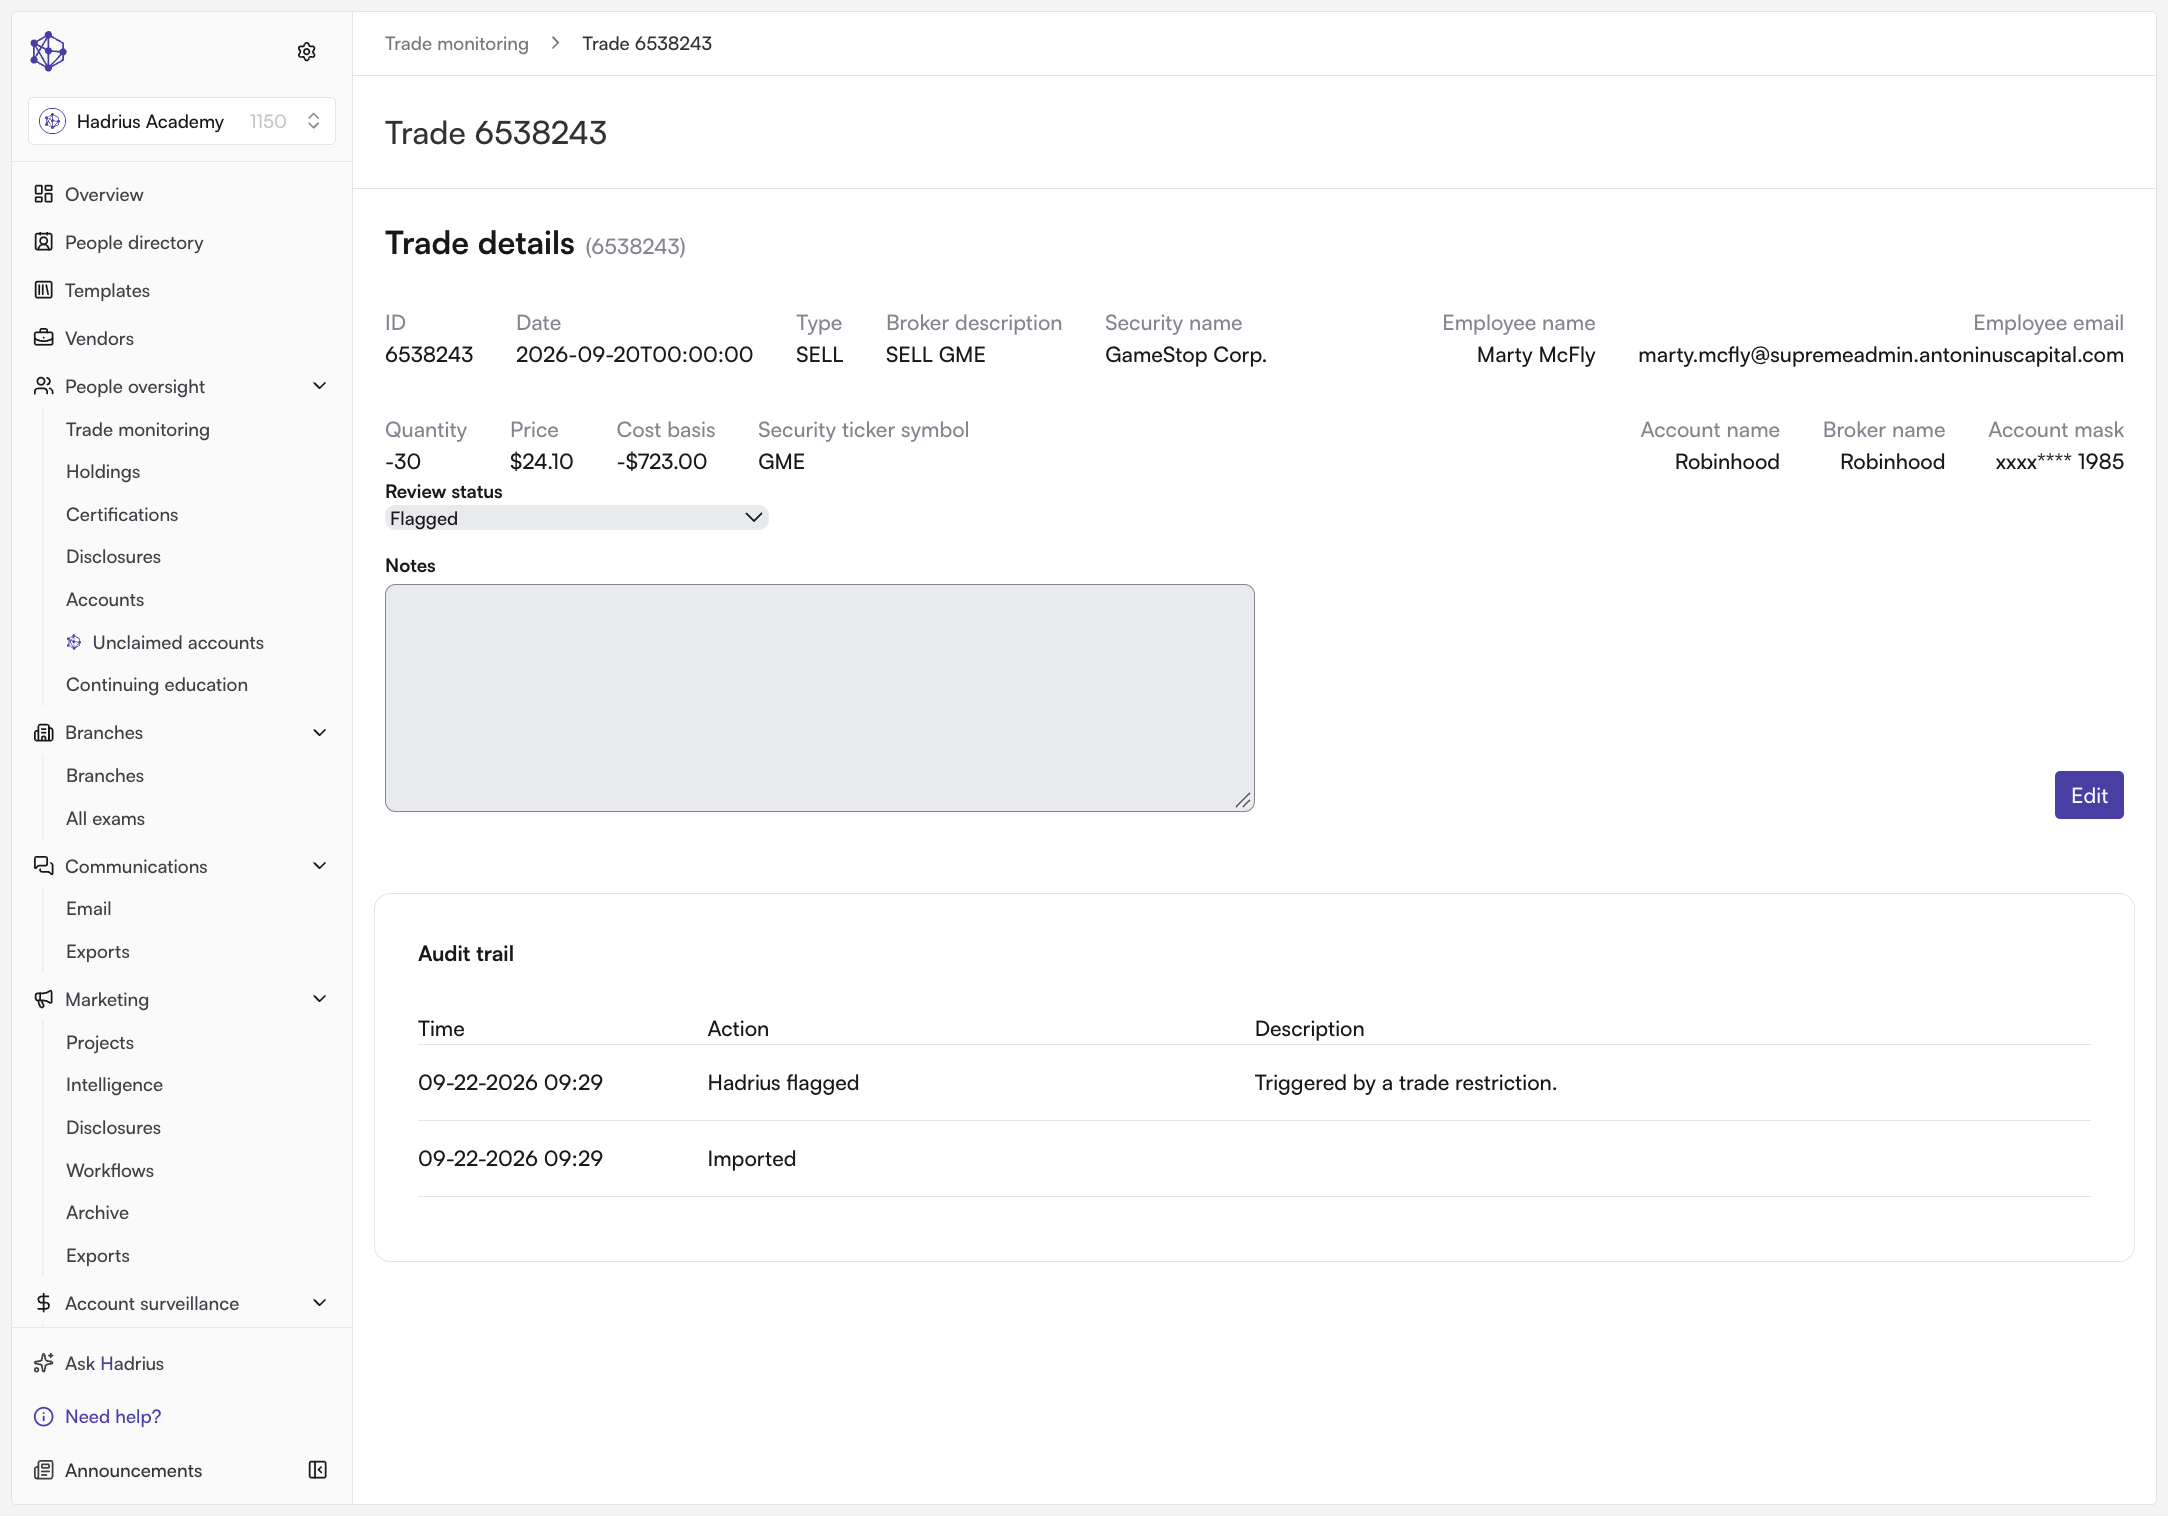
Back on the trade monitoring dashboard, open any flagged trade to see what the platform caught. The trade's audit trail records why it was flagged, referencing the firm-specific restriction that matched — the same detail a reviewer or examiner needs to understand the flag without reconstructing it by hand.
What happens next
That completes the loop: your rules define what is restricted, and the automation settings handle routine disclosures on either side of those rules. From here, reviewers only see the trades that genuinely need a human decision, and each rule's audit trail preserves the record of what was restricted and when.